Purpose
Acquia Optimize, formerly known as Monsido, is a web governance tool. It helps agency managers boost their website’s accessibility, quality, readability, and speed. It also gives you a look at your website’s health. It tracks broken links, readability scores, and accessibility issues. This info is key for making your site user-friendly and accessible.
When to use this resource
- Review your site scans on at least a bi-weekly basis with Routine Website Audits. Reviewing your site on a weekly basis is the ideal to maintaining trust with your constituents.
- Validate the Creation of New Content: You can use the On Demand Scan to check a single page as you create new content or to check your site in between the regularly scheduled weekly or bi-weekly scans.
- Content Updates: You can use the Policy Scan as a tool when cleaning up old or outdated words, phrases, or information, ensuring that pages are clear and compliant.
- Accessibility Checks: To meet readability and accessibility targets. Our goal is a minimum score of 83% for accessibility and an 8th-grade reading level for readability.
Acquia Optimize on demand site scan
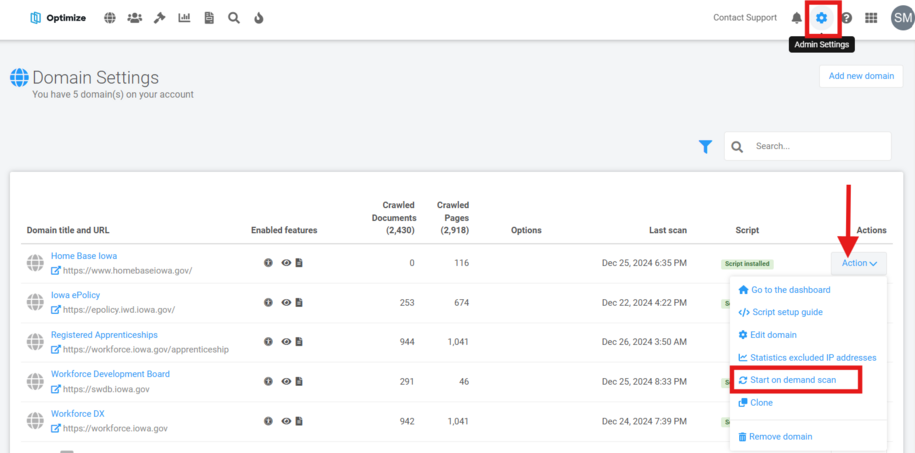
To run a scan with Acquia Optimize after updating your website, click the gear icon in the upper right corner. Then select "Start on Demand Scan." This will take you to the Admin Settings section.
From there you will select the "Action" button. A dropdown will appear. You can then select the "Start on Demand scan."
You can also review this quick video on how to create an on-demand scan.
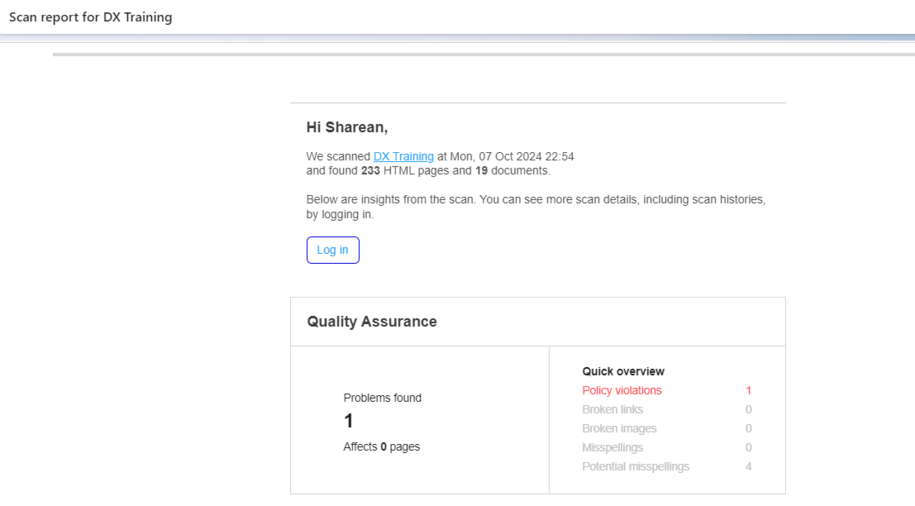
Our team runs a weekly scan on the agency websites. Each scan generates a report. This report is sent to the agencies via email. It highlights broken links and accessibility errors that need fixing.
Special Note: The best practice for how often to run a scan is once a week. If you are not receiving the reports for your site, please submit a ServiceDesk Plus ticket and our support team can help.
Checking the status of your weekly scan
You can see the scan progress of your site within the Domain Overview section.

If you notice that your scan has been paused for more than 48 hours, please contact the Acquia Optimize support team via email or chat to have it resumed.

Using the chat support feature generally results in a same-day response to help resume your scan.
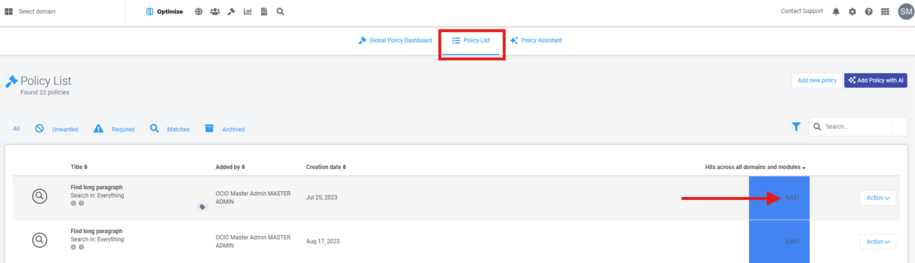
Acquia Optimize policy list scan
To find all pages with a specific phrase, number, link, or text, use the Policy List Scan. It’s the best option for this task.
This policy feature is great for anyone who wants to scan their entire site. It helps ensure there are no "click here" or "read more" phrases present.
This differs from the on-demand scan. Here, you can customize what text to scan for. It shows exact pages for your team to fix.
The accessibility scan will also show any failing checks. This includes cases where non-descriptive link text is used.
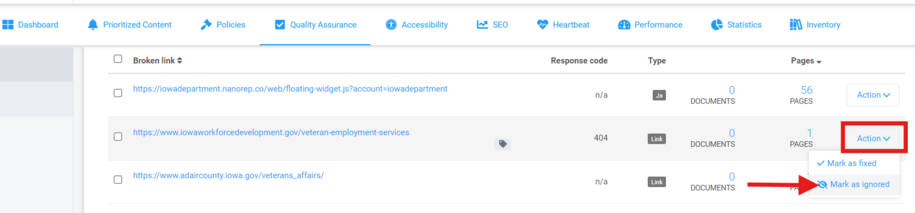
Why some links are incorrectly marked as broken
Within your Scan report there are several possible reasons for links to be flagged as broken or with errors when they are actually not:
The target server was down at the time of the scan.
A re-scan normally fixes the problem. Within the Action button you can select Mark as Ignored to stop checking this link permanently.
The target server might be set to block site scanners and spiders.
Sites like LinkedIn, Facebook, Twitter, and others block scanners that make many requests to their site. Thousands of websites are scanned every day and make many scan requests. They may block our scanner. This can cause the scan to hang or stop. In most cases, you can safely ignore the link if you know that it is correct.
The target server has an invalid HTTPS certificate.
An invalid certificate causes the link to be marked as dead. Get in touch with the manager of the website and ask them to fix their certificate or ignore the link if this is impossible.
The link points to a page that requires a login.
Such pages are often tagged as 'dead.' Within the Action button you can select Mark as Ignored to stop checking this link permanently.
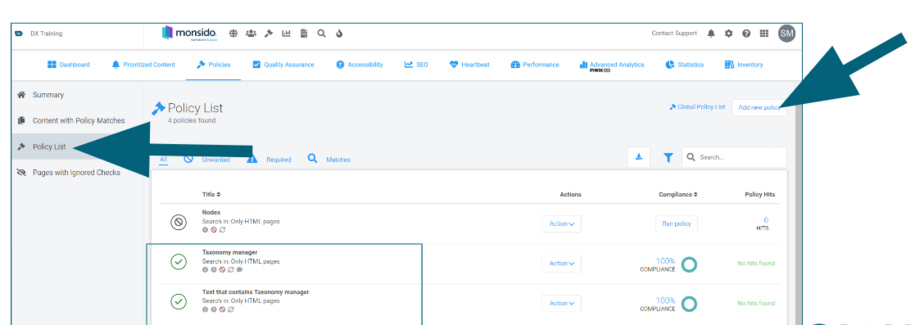
How to locate the Acquia Optimize Policy Scan
Within Acquia Optimize, under the Policy tab, you can click on the “Add New Policy” button within your policy list if you need to have a certain word or link searched through all of the pages on your site.
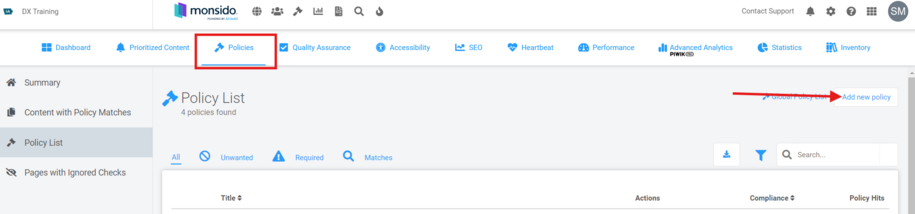
How to create a Policy Scan of your site
Within the Policies Page you will first select "Add new policy" on the far right.
Within the new window that opens you now select "Create your own policy."
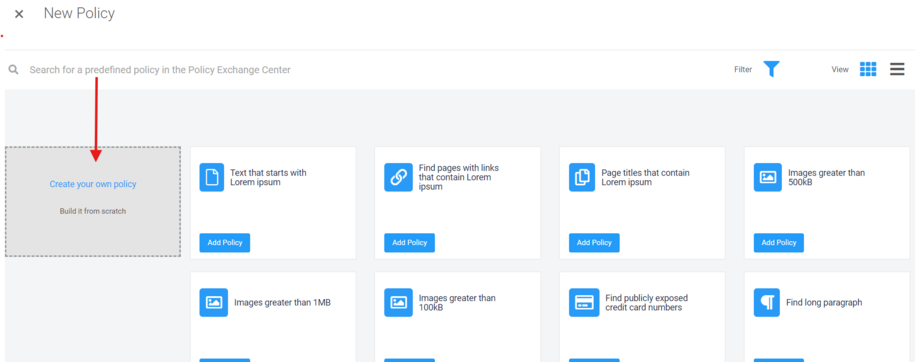
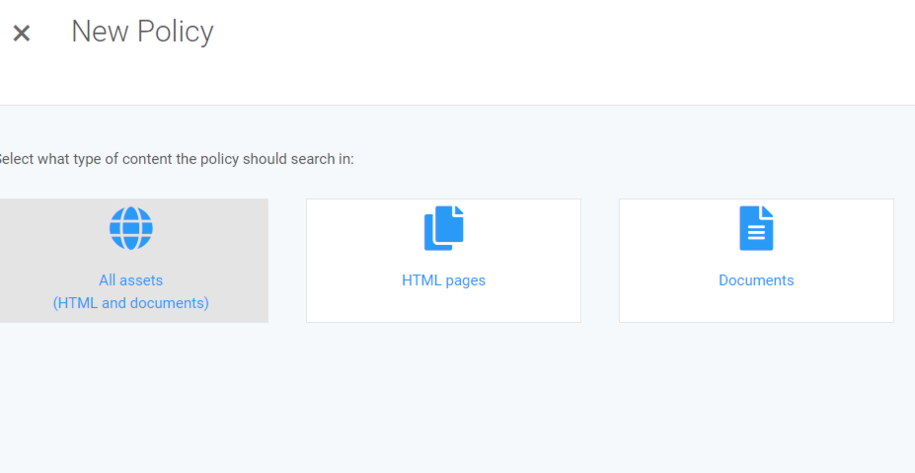
Then select the "All Assets" box.
In the next window, scroll down and select the "Choose your domain" dropdown box in the settings tab, and select your domain.
From there you can click the "Add Rule to Policy" within the right-side field. A list will appear and from there you will pick the "Select text from the list."
This is where you can add the word/phrase that you want the scan to search for.
Make sure to click save after you've added the policy rule. Once you finish saving the policy one final time, the window will bring you back to the policy list page and the scan will run automatically.
How to create a custom word search Policy Scan
Within Acquia Optimize you can also use the Policy scan regex feature to have Acquia search your site for specific words or terms and the scan will also be able to search the documents uploaded on your site, for those terms as well.
To create a custom policy that uses the regex feature to find specific words or terms on your site:
- Click Global Policies Overview (mallet icon) on the top menu bar of the domain dashboard.
- From there the Global Policies page will open and you can then click the Add New policy button in the far-right hand corner.
This will cause a window to appear and within this section you can select the type of policies you would like. Since we want the policy to scan both our site and documents, we will select All Assets (HTML and Documents).

- Next select Settings from the options at the top of the New Policy page.
- The Settings section is where you can pick the policy display tag where this policy will appear.
- Unwanted: Unwanted items are displayed with this tag.
- Required: Required items are displayed with this tag.
- Matches: Items that match are displayed with this tag and directly underneath.
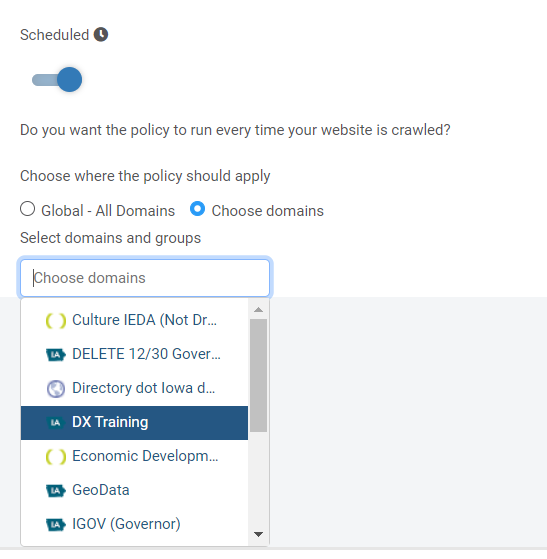
- You can also choose to have the policy set on a schedule by either selecting OFF or ON:
- OFF to include this policy in the scan manually
- ON to include this policy every time the website is scanned
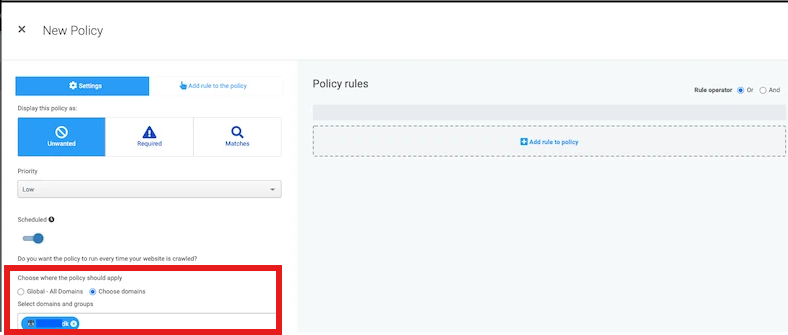
- Lastly you can choose where the policy should apply:
- Global-All Domains: This policy will run on all domain scans within your domain account.
- Choose Domains: This policy will run on only selected domain scans.
- Click in the field and select the domains from the drop-down list.
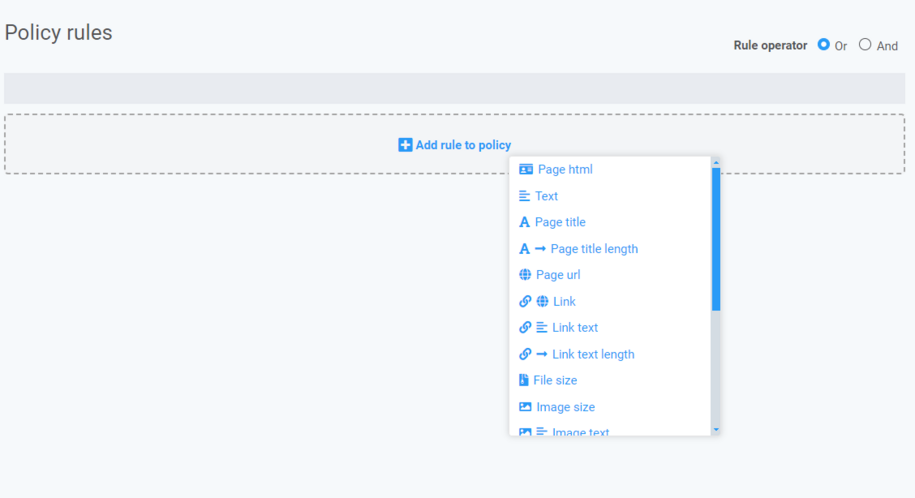
- Once you've picked your settings you can Select +Add rule to policy: The rules selection list will then open. Drag and drop a rule into the Policy Rules section. For this custom search term/word scan we will use the Text Rule. Once you've dragged and dropped that rule into the right-side field box, the New rule pane will open.
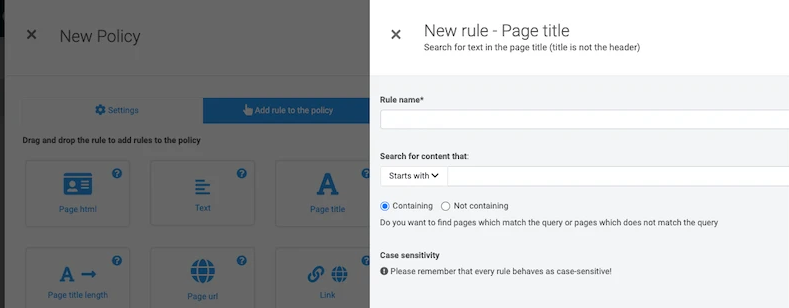
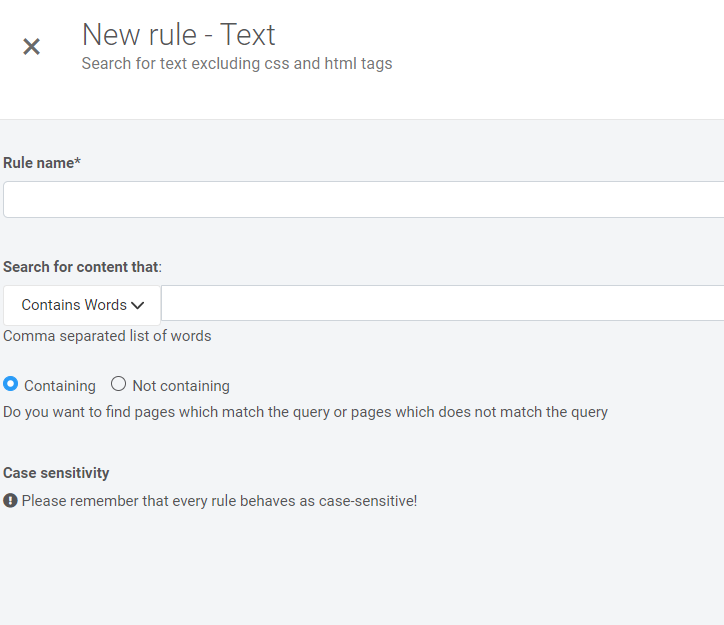
- Fill in the fields and then within the dropbox under "Search for content that:" you will want to select the dropbox to locate the Regex option. This will allow you to add a regex code that tells the policy to search for a specific word or term.
For our example we want to have this policy scan the site to find all documents and pages that have the word nouns, the regex code will look like this (?:nouns|Nouns|NOUNS).
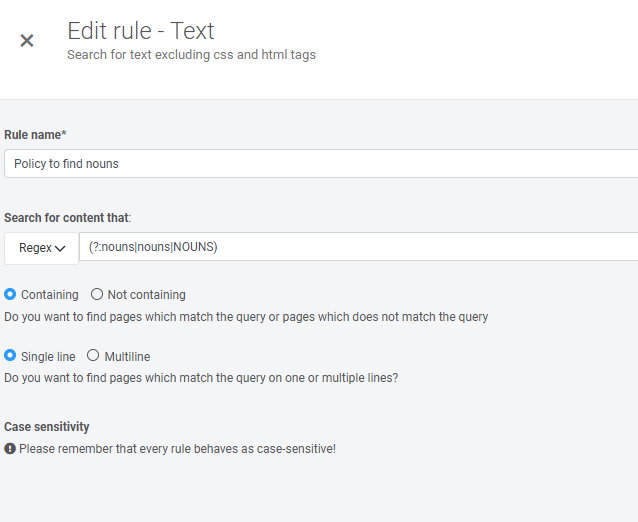
This allows the scan to locate that word if it has different capitalizations. If the search term you are looking for is a two-word term, then you would repeat that same code setup.
For example, the regex code for a two-word search term like 'apple pie' would be (?:Apple|apple|APPLE) (?:Pie|pie|PIE)
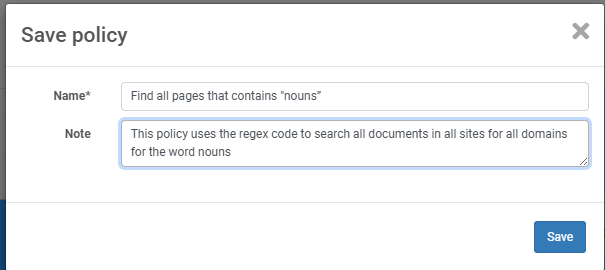
- Once you are done adding your regex custom search term, click Save. The New rule-Text window closes, and the Policy Rules page is visible. Click Save on this page to save all of the changes. A final dialog box will open.
- Enter the policy Name (required) and include a Note in the dialog box, then click Save.
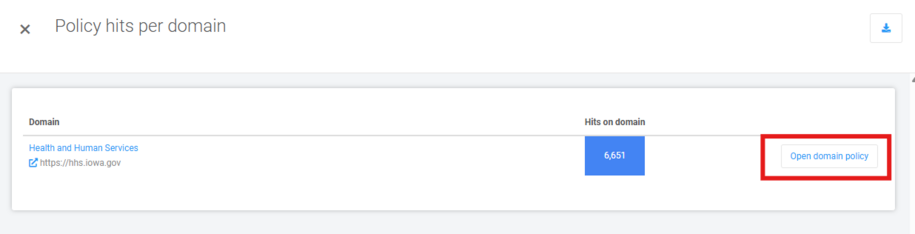
Once the policy is done with its scan, you can see the scan results within the policy list page section. In this page if there are any documents or pages that have been found that have that word, the number of finds will appear on the right side of the policy list.
When you select that number it will bring up a new window where you can select the "Open Domain Policy" button on the far-right side. This will pull up all the pages and documents that have been flagged.
- If there are no finds, then within the "Hits across all domains and modules" row it will appear as 100% compliant.
How to create a link search policy scan
You can use the regex, html policy scan to help do a search on your site to find any specific url link strings that are within hyperlink text or within the html a href code.
In order to create this policy scan first select the +Add rule to policy to add a rule to the policy and you will want to select the HTML pages:
Next add your rule name and within the "Search for content that" dropdown you will select the regex option. This is where you can add your regex code to search for a specific url link string or url path that is linked inside of your site as a hyperlink:
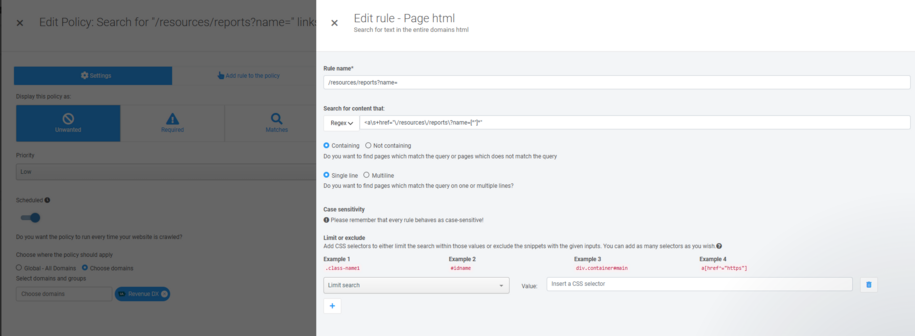
For example if I want to search for this url link path that has this in it "/resources/reports?name=" then the regex code I would enter in that policy field is: "<a\s+href="\/resources\/reports\?name=[^"]*"
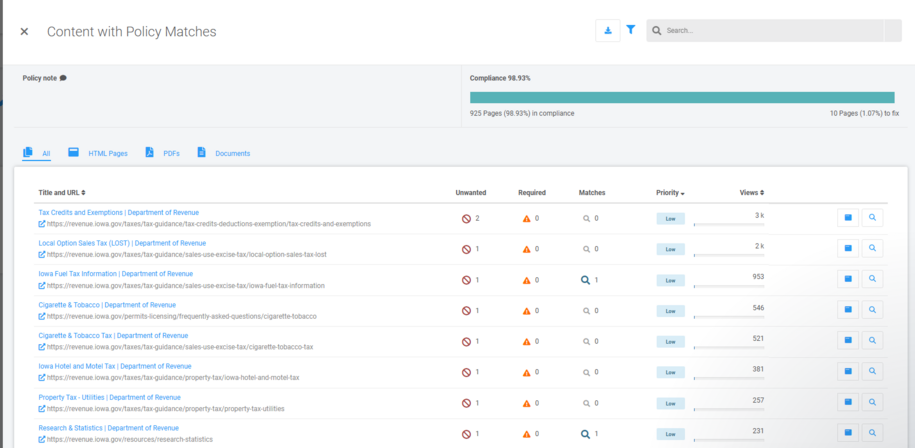
Once that is entered you can select save and then wait for the scan to show you the number of pages it's found within the "Policy hit" column. This will bring up the pop up pages that has all of the links to the pages that the scan had found.
How to locate broken links
You can view broken links on your site in the weekly reports from Acquia Optimize (formerly Monsido).
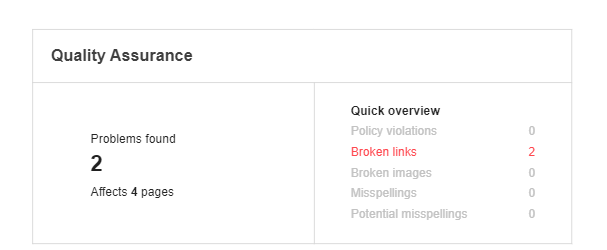
This report shows the Quality Assurance section. It will list broken links and possible misspellings on your site:
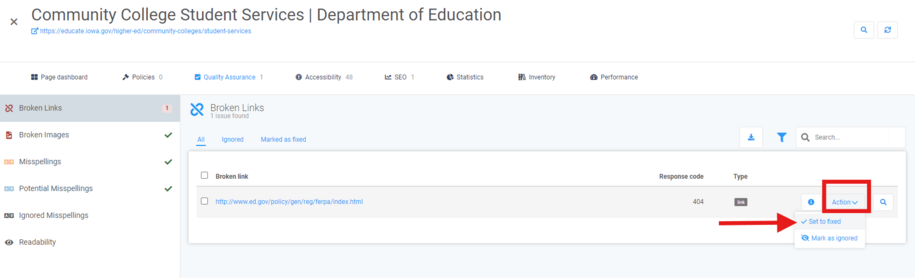
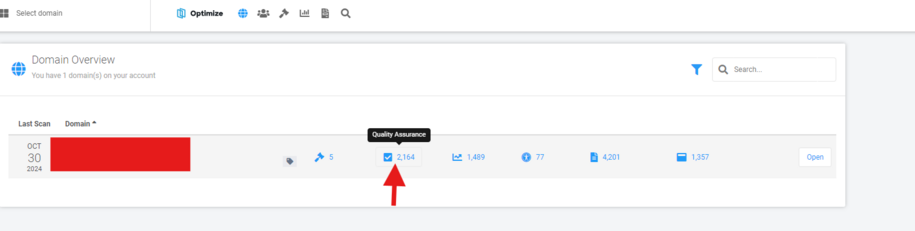
To find each page with a broken link, log into Acquia Optimize. Click the "Quality Assurance" button.
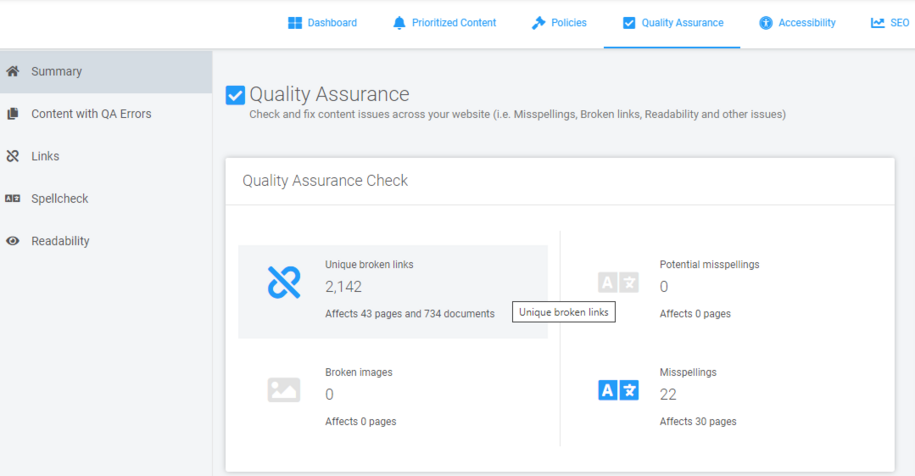
From there, select the "Unique broken links" section to see the list of the broken links.
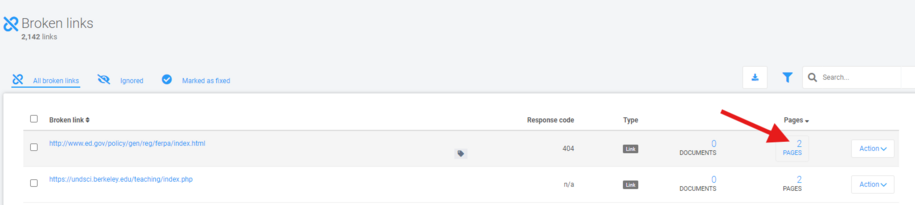
Click on a page number to see a list of pages with broken links. A pop-up window will show you all the affected pages.
To find the broken link on your page, click the magnifying glass icon in the top right corner of the pop-up window in Acquia Optimize.
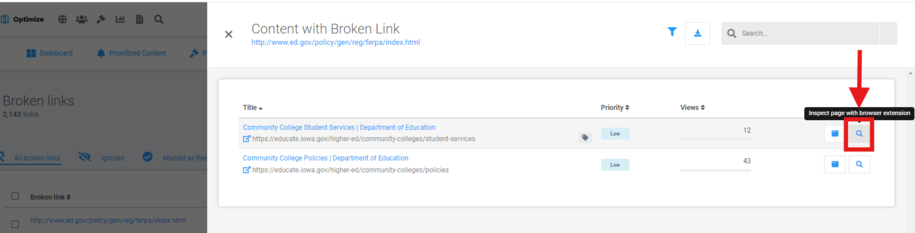
If you have the Acquia Optimize browser extension, it shows up on the right side of the screen when you click the magnifying glass.
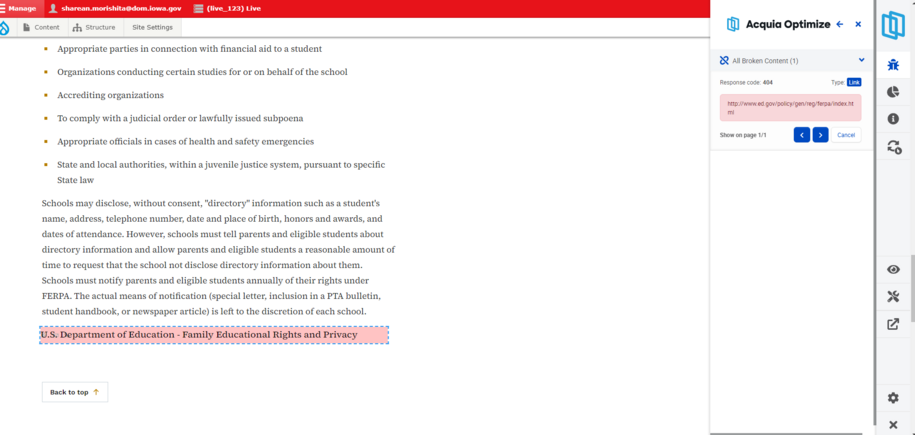
If the web browser doesn't highlight the broken link after you click the magnifying glass, you can still find it. Just click the magnifying glass in the pop-up window, and it will show you the broken link on the page.
How to fix a broken link
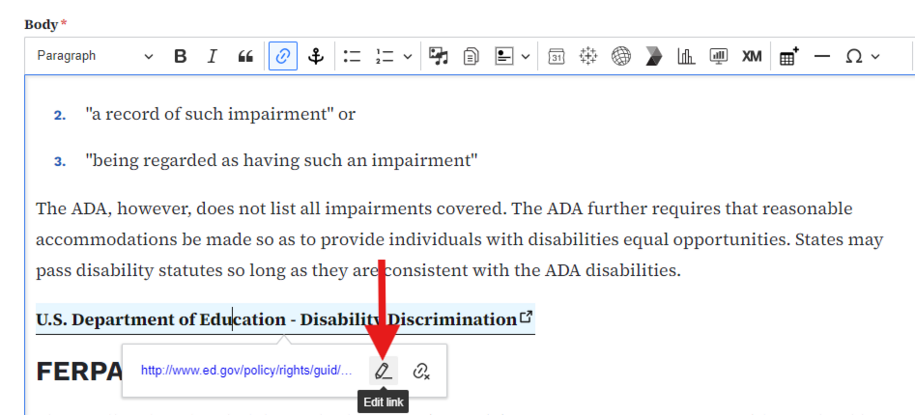
To fix the broken link, first find it on the page. Then, click the edit button above your page title.
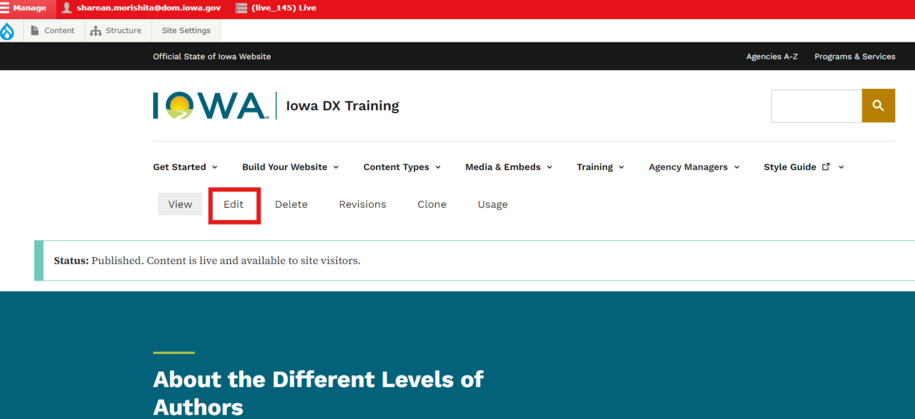
In the page edit section, click the broken link. To fix it, select the pencil icon that appears when you click the link text.
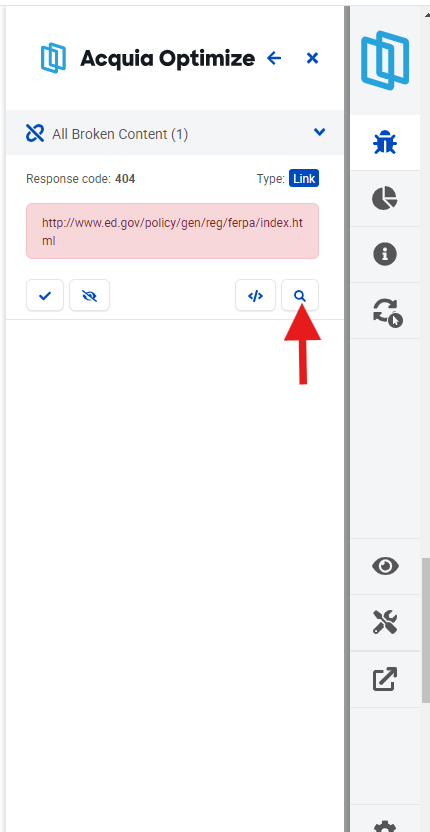
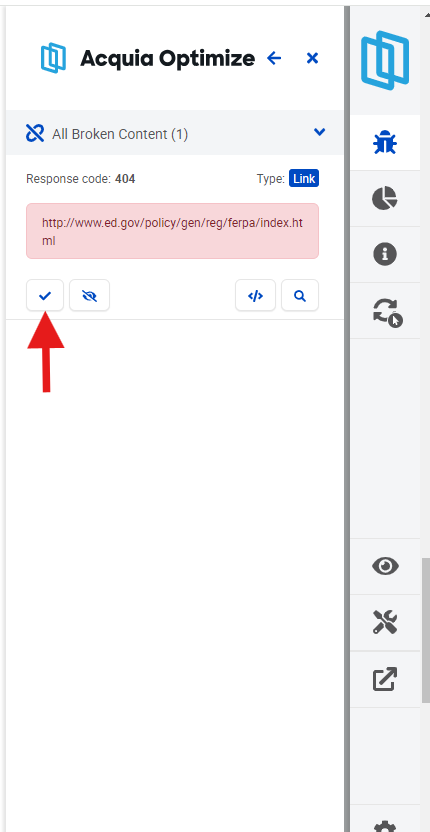
Now that the link is fixed, save the page. Then, in the Acquia Optimize Chrome extension, mark the broken link as fixed by clicking the check mark.
You can mark the broken link as fixed in Acquia Optimize. Just click the "Open page details" button next to the magnifying glass.
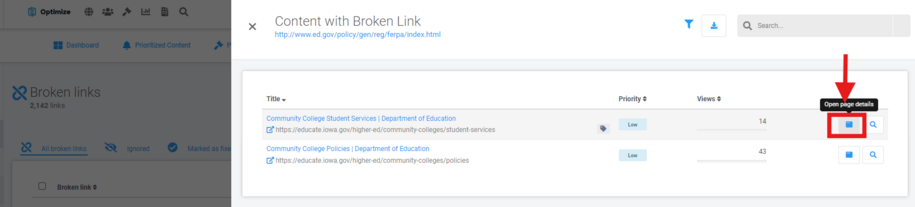
In the new window, click the action button. Then, choose "set to fixed" to mark the broken link as fixed. This will remove it from your report and improve your Quality Assurance Score.