Purpose
The Listing page lets you create dynamic pages. You can showcase different content types in a list format. It simplifies the management and presentation of large amounts of similar content.
When to use
This is ideal for situations where you need to display collections of content:
- News and Events: Create a Newsroom page listing all your news articles.
- Team Bios: Build a people page showcasing team member profiles.
- Training Materials: List all training materials or resources.
- Location Listings: Display a directory of your business locations.
- Custom Content Types: Utilize Listing pages for any content type that benefits from a list format.
Elements of Listing pages
The Listing page allows editors to collect buckets of content together into one long list. These might be used, for example, for a News Feed or Newsroom page of all past news items, or a long list of all Basic pages assigned to a specific Topic.
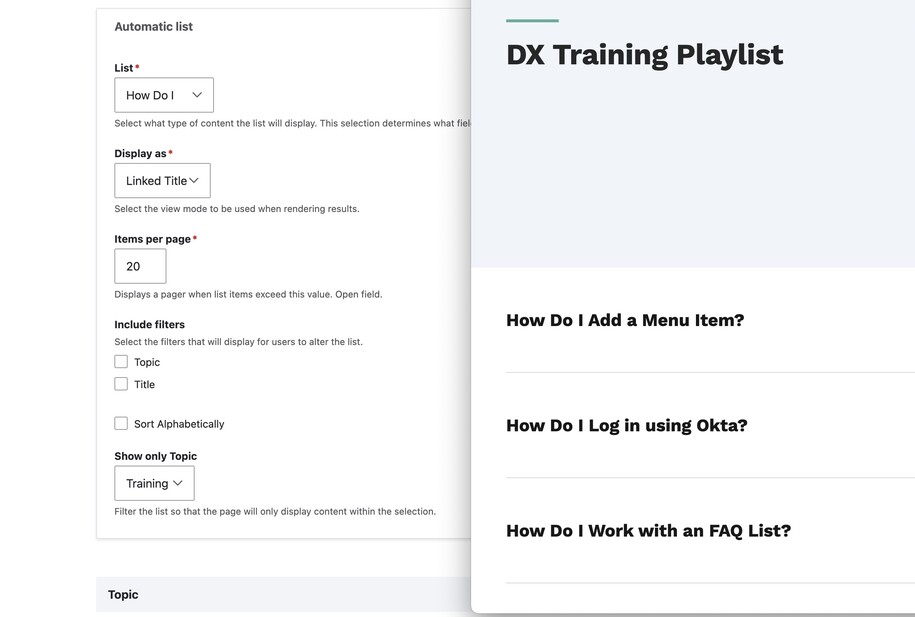
For example, the Training Playlist is a Listing page of all Basic pages with the topic of Training.
- Type of content: How Do I, News, Basic pages, Locations, Contacts, Documents, etc.
- Display as: Teaser or set of linked titles
- Items per page: How many items you want to display on the listing page
- Include filters: Filters appear at the top of the list and allow for additional filtering of content produced in the listing page
- Sorting: Select the check box for an alphabetized list. Deselect the check box if you want the sorting to be based on the date from newest to oldest
- Show only one topic: Constrain results to one Topic pulled from your Topics taxonomy list
Here are some variations:
Listing page of linked titles, showing only one topic:
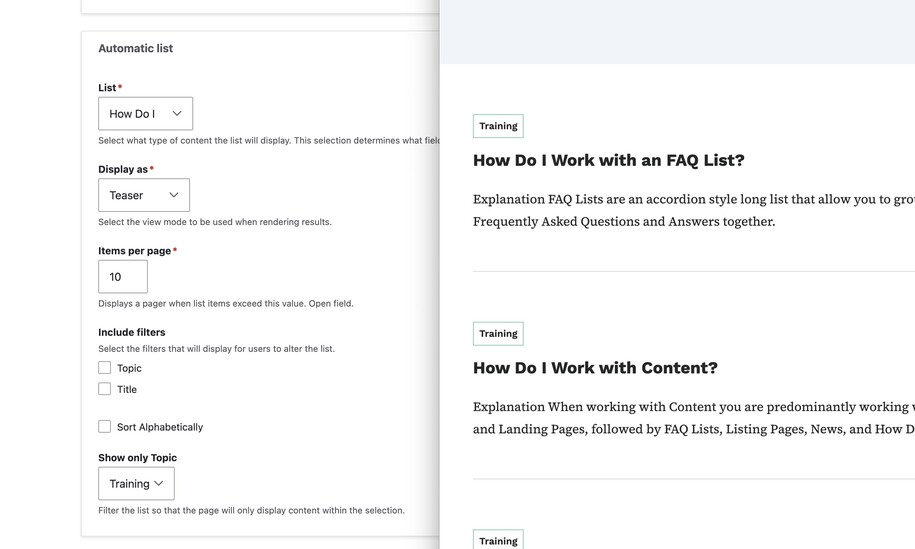
Listing page of linked Teasers, showing only one topic:
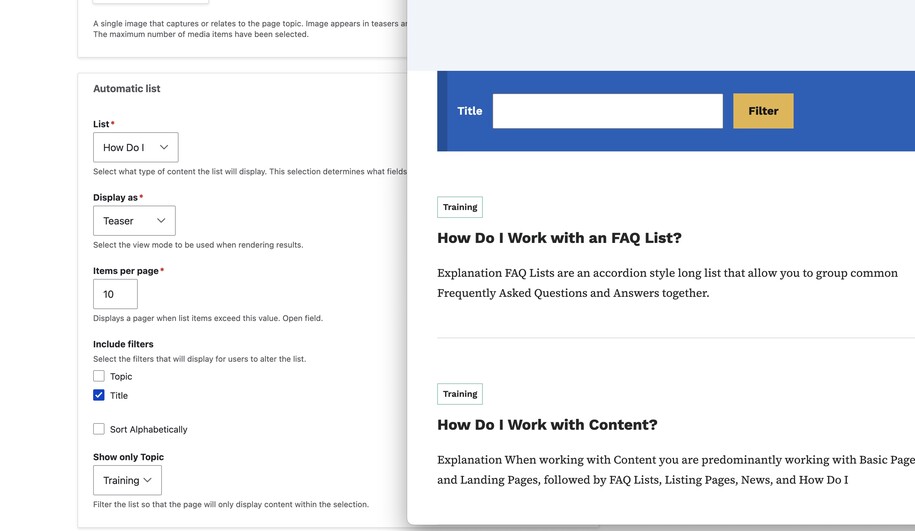
Listing page of Teasers filtered by title:
Listing page of Teasers filtered by title and topic:
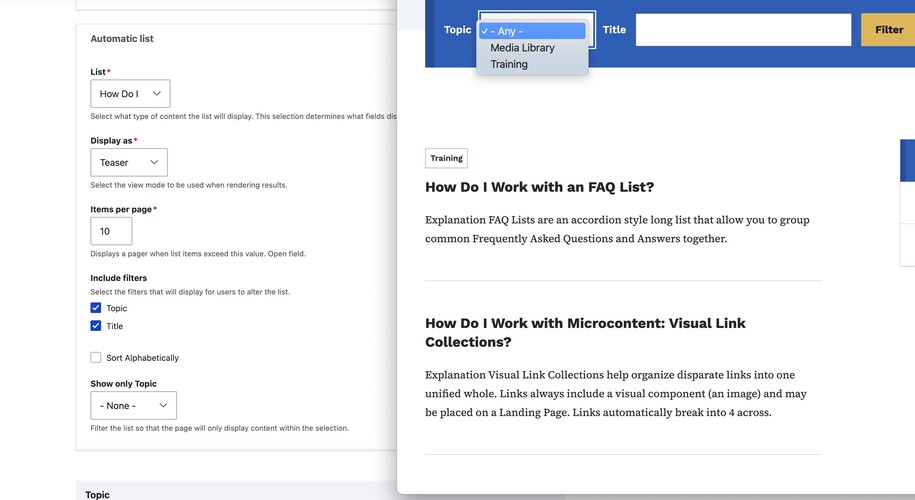
We recommend building a Listing page of all Basic pages and use that as a base to test options.
Login to your site
Make sure you are logged on to the VPN first.
You can login to your site from your Okta tile or login.iowa.gov.
Each person on your agency team has a specific user role for the website. These roles set permissions. They control who can write, edit, review, or publish content. You can ask for a role change or remove a role.
Submit a ServiceDesk Plus support ticket if you need help.
Create a Listing page
To create a new Listing page, follow these steps:
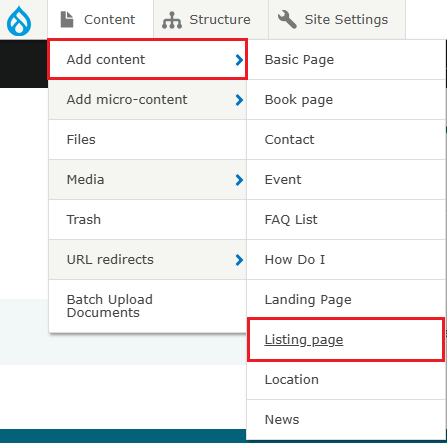
- Go to Content in the navigation bar
- Click Add content
- Select Listing page
Options for creating a Listing page include:
- Listing page of Basic pages to collect and display Basic pages
- Listing page of How Do I to collect and display How Do I content
- Listing page of Events to collect and display Events
- Listing page of News to collect and display News
- Listing page of Locations to collect and display Locations
- Listing page of Contacts to collect and display Contacts
You can narrow your display by selecting specific types within your category. For example, you can choose Topics, Event Type, Contact Type, or Location Type.
Customize the sorting order
Listing pages automatically sort content or media from newest to oldest. You can change this by checking the Sort Alphabetically box.
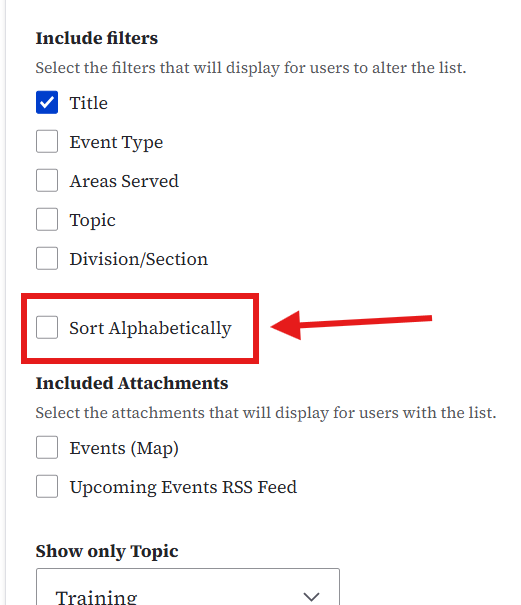
If you would like to further customize your sorting, use the Taxonomy. In the Show only dropdown boxes, you can choose Topics, Event Types, Areas Served, or Divisions to display on the Listing page. You will need to make sure you have those content pages tagged with those specific taxonomy.
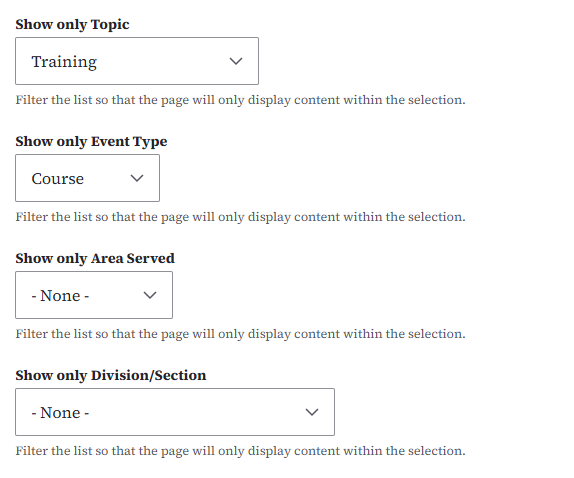
Customize document sorting
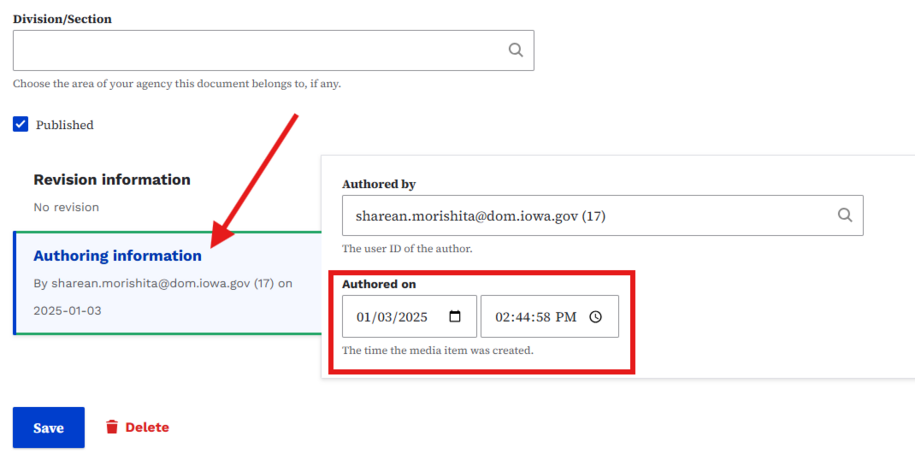
To manually customize the sorting, find the document in your Media Library. Click the edit button. This will make uploaded documents appear first.
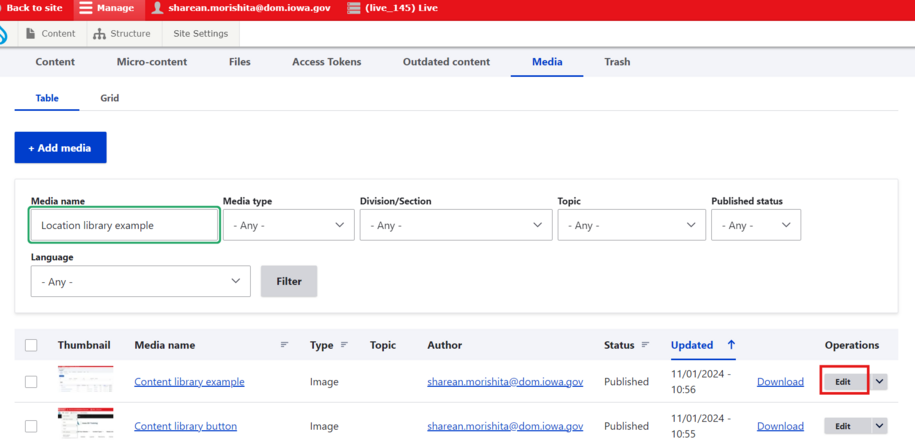
On the editing page, scroll down to the Authored on section. In the date box, pick the earliest date to make the document show up higher in the list. If you want it lower, select an older date instead.
