Understanding the Media Library
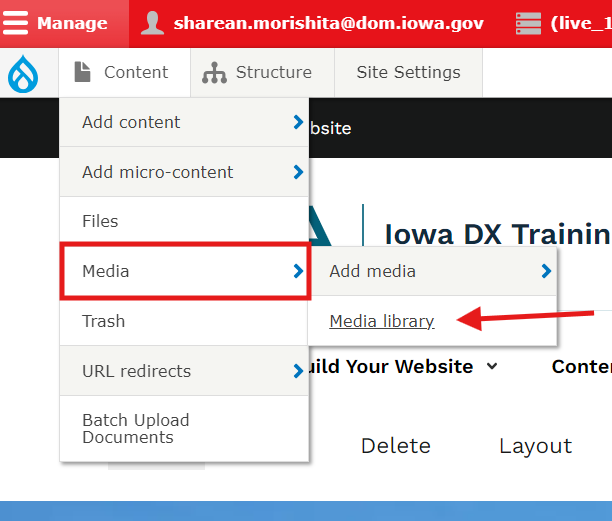
You can find the Media Library on any page you create. To see the full Media Library list, click the Content link. Hover over Media to find the Media library in the dropdown.
The Media Library stores all document files, URL embeds, and images uploaded to the site.
This is the current list of media items that are available to upload to the Media Library:
- ArcGIS Visualization: Embed an ArcGIS map or app on a page easily, just providing the URL.
- Crowdiff: Embed a Crowdiff ID
- Data & Insights: Embed a Data & Insights widget
- Document: A downloadable document, like a Microsoft Word file or PDF
- Flickr: Embed a Flickr image or slideshow from a URL embed
- Google Calendar: A Google Calendar from a embed URL
- Google My Map: Embed a public Google My Map embed URL
- Images: An image to be used in your site
- Power BI Visualization: Embed a Power BI visualization on a page using the visualization URL or embed code
- Qualtrics: Embed a Qualtrics embed from a URL
- Remote Video: An embedded remote video from a site like YouTube or Vimeo from a URL
- Tableau Visualization: Embed a Tableau visualization on a page easily, just providing the visualization URL
Media entity usage breakdown
The media usage section of Media items uploaded helps you to verify if a Media item is being used or linked on a live page or within an old revision or both.
- Default: The media item is being used on the live page
- Old Revision: The media item is in an old version of the page
- Default + Old Revision: The media item is being used on the live page AND the media item is in an old version of the page.
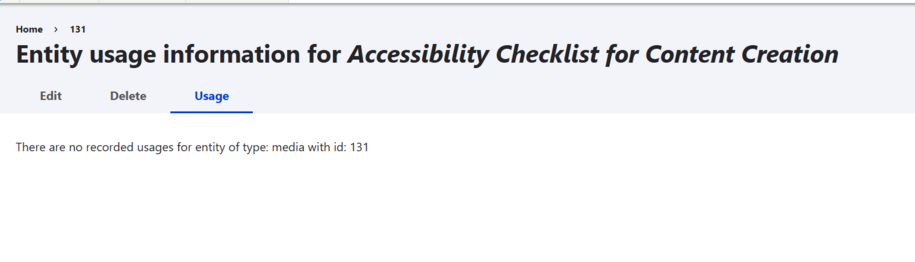
The Used in row will only appear if the page that Media was used on has been saved more than once. Here's an example of a media item that was never used but is sitting in the media library:
When you use that Media item on a page for the first time, the Media usage tab will then show a table that includes the page that media is used on and the status of the page.
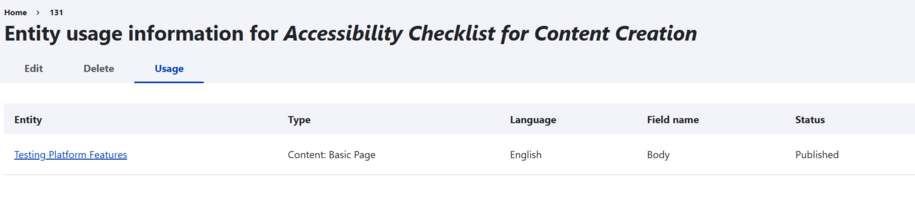
Seeing only the status column within the table means that the media item is being used on a live published page and has been saved only once.
Used in row
When you go back to that page and make edits and save the Media item that is still live on that page, it will now include the Used in row that says Default and Old revisions.
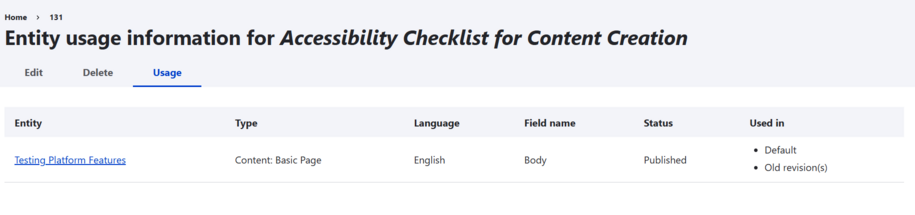
If the used in field has both Default and Old revision(s), that means that the page this media item was used on has gone through edits and saved but the Media item is still on the live page and now inside of an old revision of that page.
If you remove the media item from the page, within the usage tab of that Media will only have the words Old revisions within the Used in section column.

Listing Pages Usage Tab
One additional note to also keep in mind, documents that appear within a listing page results are not counted as being used.
The reason being is since a listing page is just our own editable search engine content type that we can use to show users the documents or pages within our content and media library.
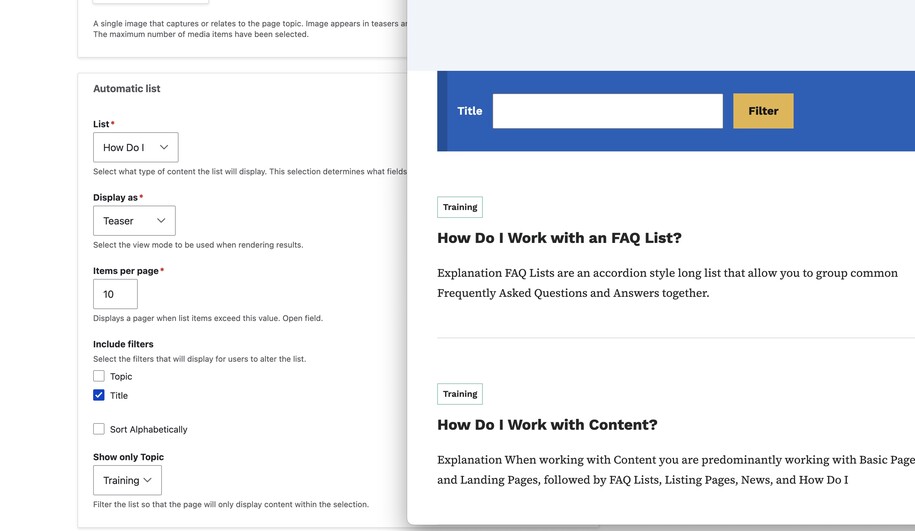
Image alt text location
The Media Library is also where you can easily locate and review the alt text for your images to make sure they follow accessibility guidelines. This is also where you can edit your media item name or update an old image file to be replaced with a new image file.
Special note on Media Library image sizes
If you are planning to place images in the Hero section, they will need to be a minimum of 1440px x 604px, but ideally to scale for retina, we like to double the size 2880px (wide). Learn more about image ratio.
Our rule of thumb is the image should always be equal or bigger to the size it will be displayed.
We are trying to keep all images on the site to a 4:3 ratio, but the hero is a bit more custom. We have allowed for uploads of source images up to 100MB with the focal point to be determined at the Media Library level. If you are planning to use them elsewhere i.e. Promos, they should work fine in terms of size. Try to keep everything to a minimum of 1440px for width.
Images used as the feature on Basic pages, Promos, and Visual Link Collections follow the 4:3 ratio, meaning that for every 4 pixels of width there should be 3 pixels of height. To calculate the image ratio: Take the height of your image and multiply it by 4/3 to compute the width or take the width of your image and multiply it by 3/4 to compute the height. You can use this image ratio calculator.
If you need to adjust your image size and do not have Adobe Photoshop or another image editor, you can use one of these free online tools:
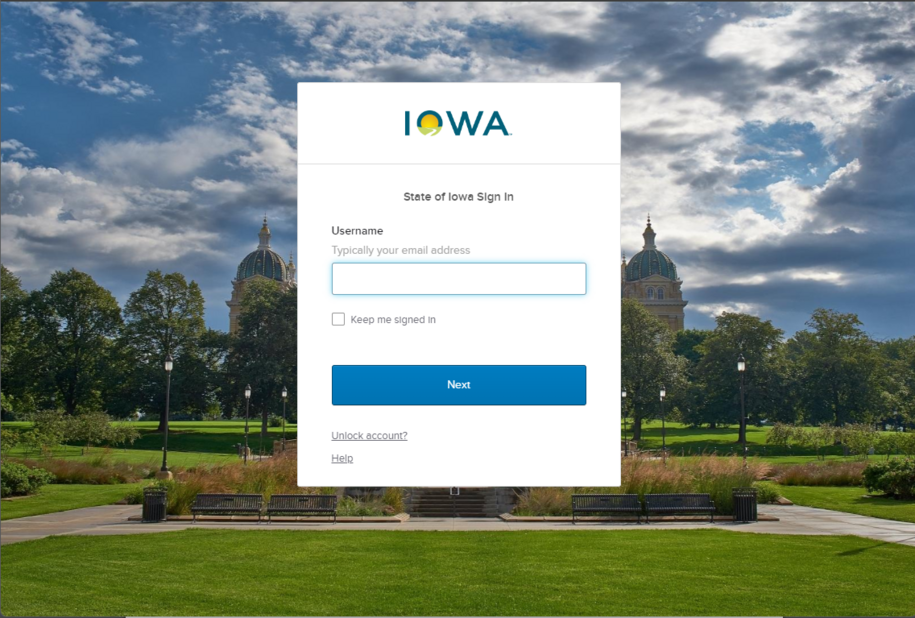
Login to your site
Make sure you are logged on to the VPN first.
You can login to your site from your Okta tile or login.iowa.gov.
Each person on your agency team has a specific user role for the website. These roles set permissions. They control who can write, edit, review, or publish content. You can ask for a role change or remove a role.
Submit a ServiceDesk Plus support ticket if you need help.
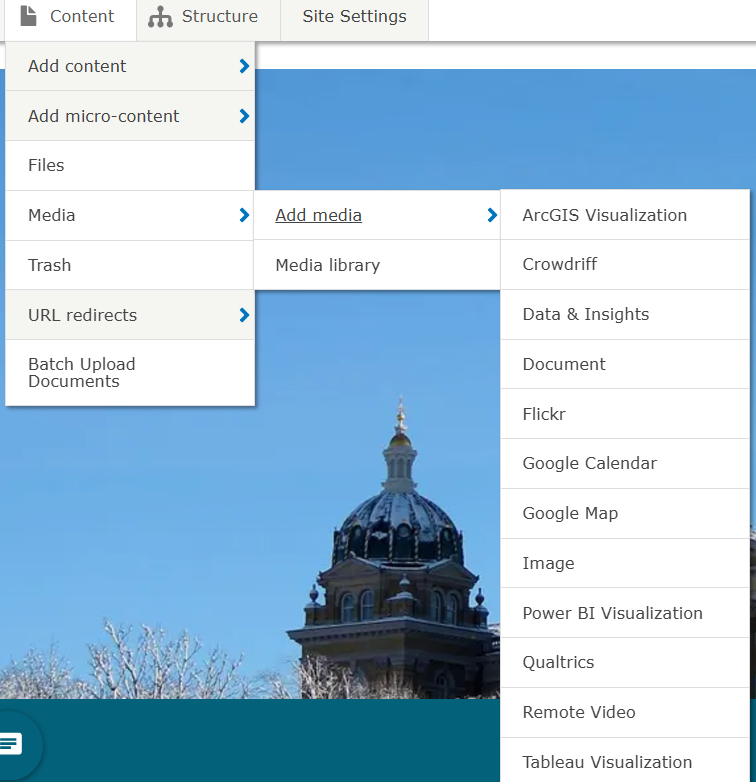
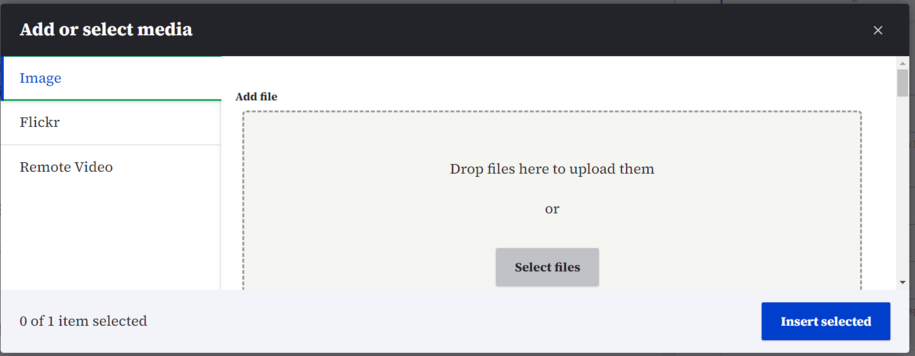
How to add media to the Media library
You can find the Media library by hovering over Content in the top left corner. Then hover over Media and select Add media.
From here you can pick from the list of media that you would like to have uploaded to the library section of your site.
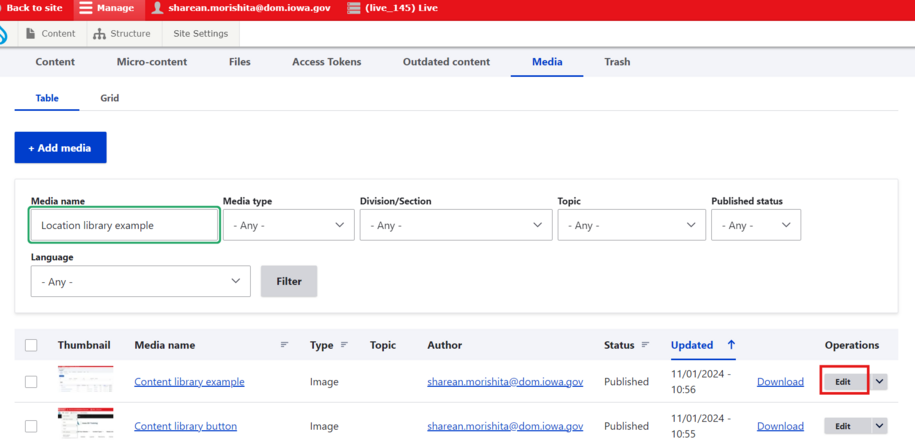
How to update alt text for images
To update the alt text for your media images, go to the Media library. In the search filter, select Images. This will show all the images on your site. From here you can search for the name of that image that needs to have the alt text updated.
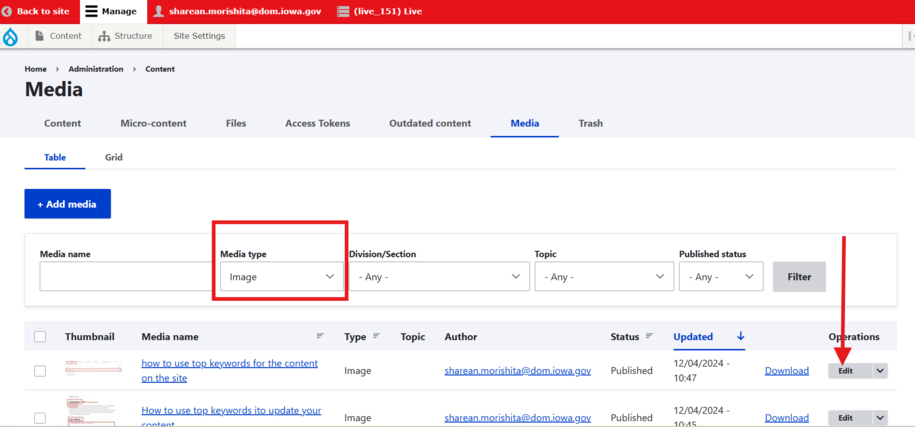
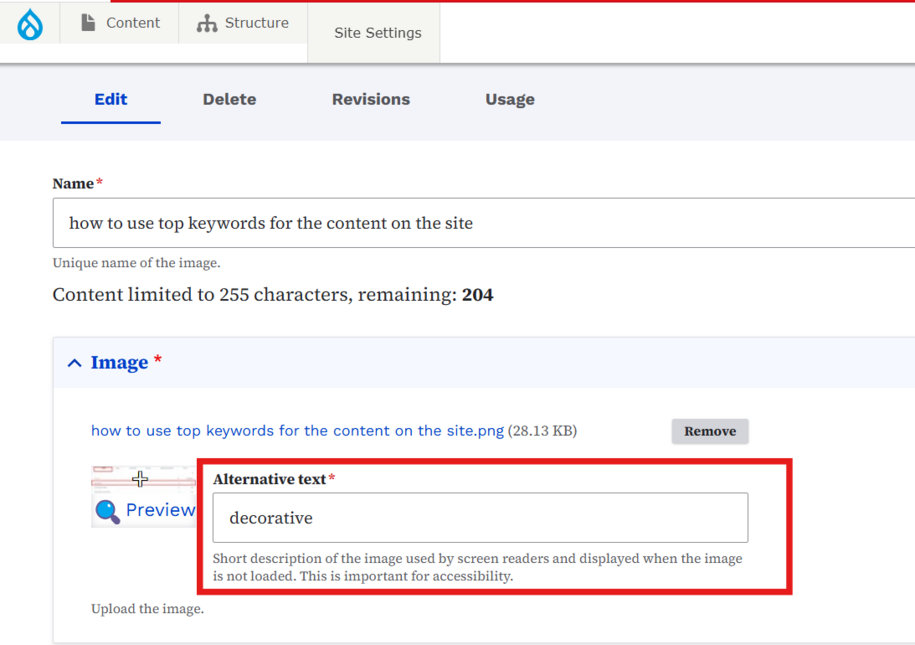
Click the edit button. This opens the Media item edit section. Here, you can check the image's alt text and title. You can also replace the image file with a new version if you want. Once you are done all you have to do is select save.
If the Editoria11y checker flags an image on a page, you can still update its alt text. Even if you're unsure how to find that image in the Media library, it’s easy to make the change right in the page.
Just click the edit button on the page with the flagged image appears. Then, in the text field, select the embedded image. This will show a small toolbar pop-up.
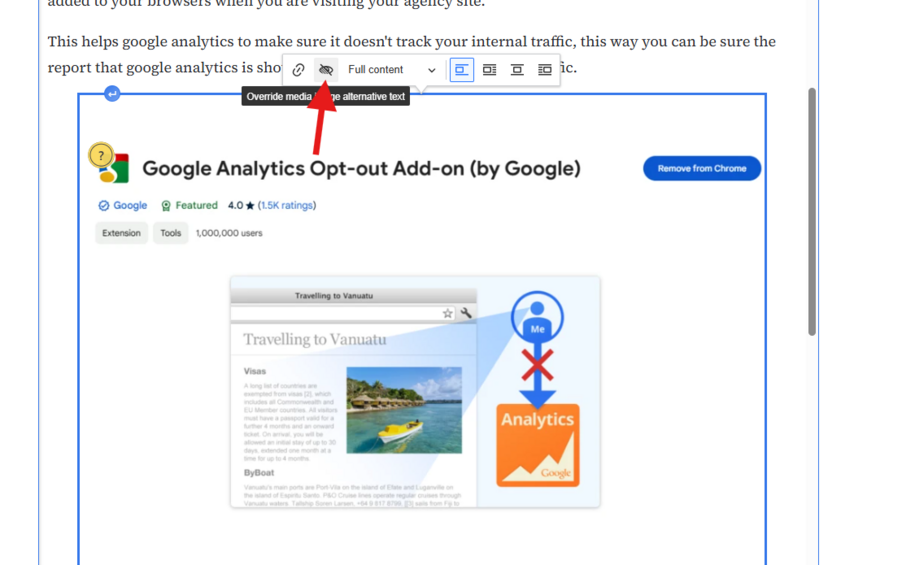
Here, you can choose the eye icon to change the alt-text. You can also mark the alt-text as decorative.
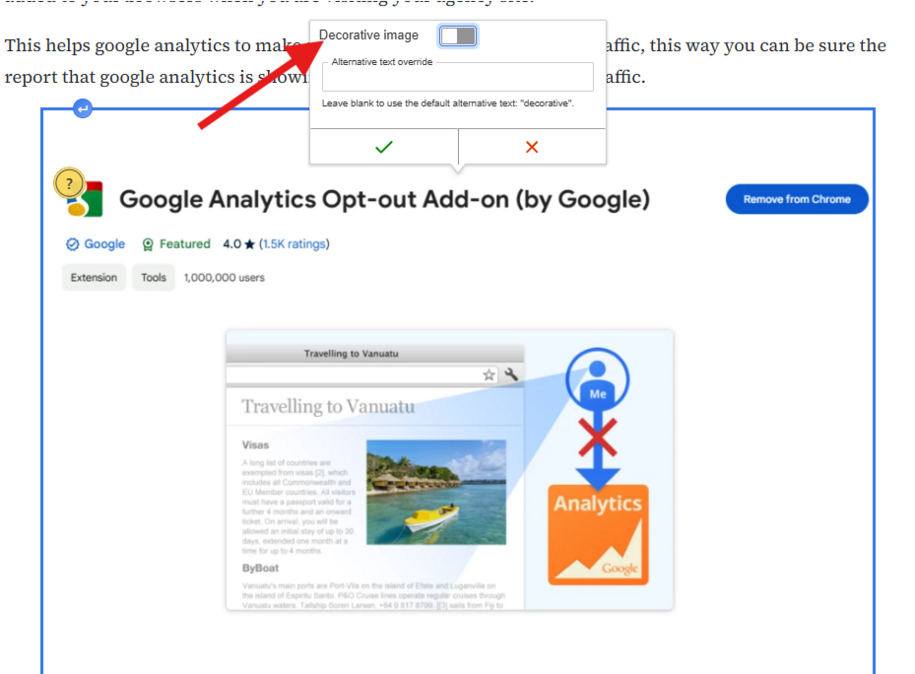
Special Reminder: Alt text is ordinarily set as decorative if the information in the image is redundant. If the meaning and purpose of an image is already covered within the text that image is embedded in, then there is no need to make screen reader users listen to the same information twice.
How to add Media to a Basic page
To add the Media image that you uploaded to your Media library to a Basic page, you'll use the insert media icon within your WYSIWIG toolbar.

Once you select that icon you can then scroll down to search and view the Media items that are in your image library.
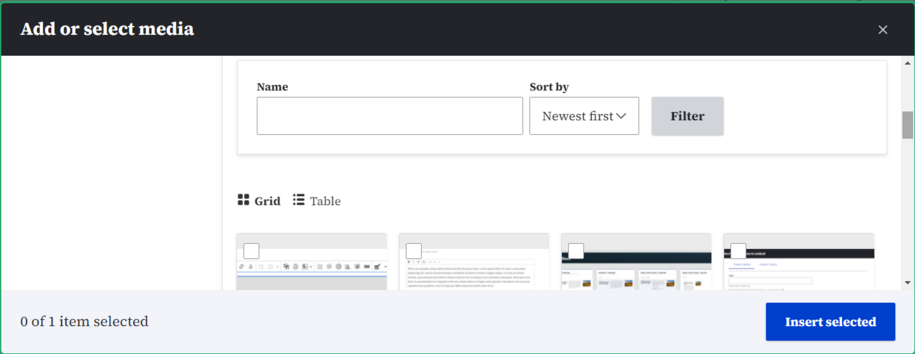
You can also add new Media items to your Media library page from here.
Once you click on the Insert selected button, your image will be embedded on your page
How to find Media from a URL
If you have the media file URL but not the name, try this: go to the URL and add /download?inline at the end.

Replace it with /edit and press enter. You will go to the Media item edit page. There, you can find the Media item name. Use this name to easily locate it in the library.