Documents like PDFs and Excel files can be uploaded and stored in the Media Library as individual files.
It is helpful to make sure when you upload media onto your site you properly have the relevant division, topics, and document type tagged so when your team downloads the document report you can have a clear view of what that media item is.
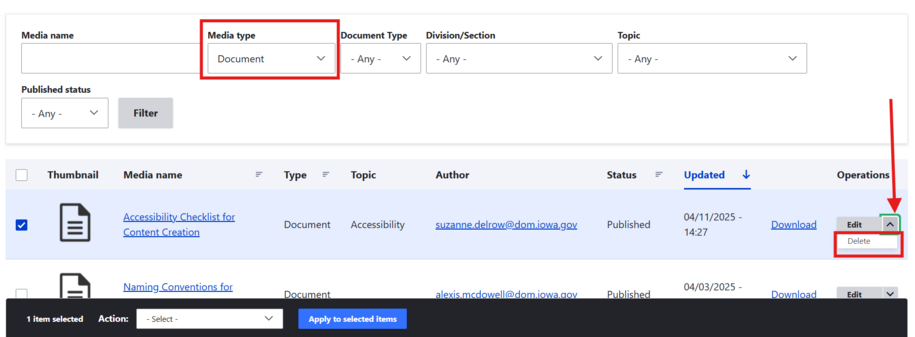
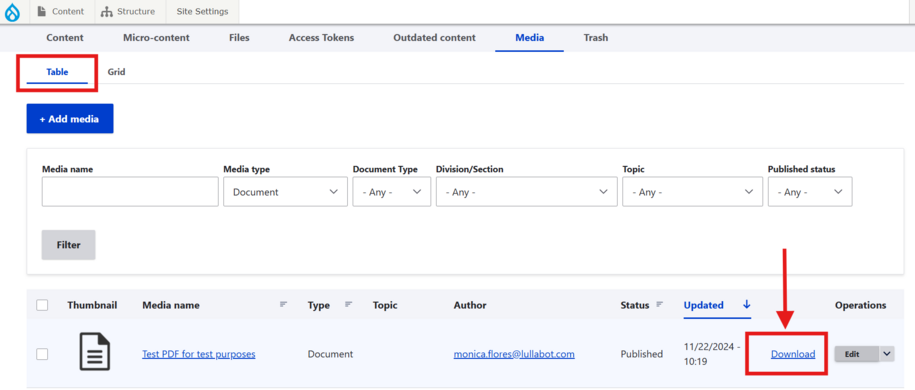
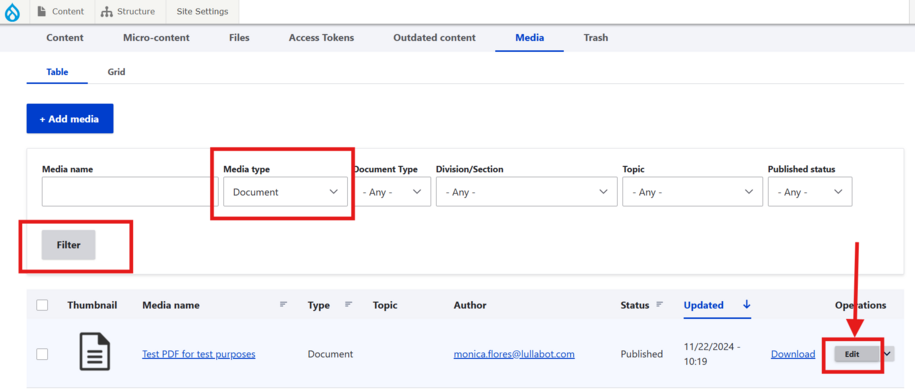
When you go into the Media Library, you can easily locate Documents that have been uploaded by selecting Document within the Media type dropdown box.
Benefits of managing documents through the Media Library
Benefits to uploading documents directly to the Media Library include:
- Easier document management
- All files are updated in one place. It saves time looking for links in your website.
- Changes will apply automatically across the entire site.
Check your document file name before uploading
Before uploading a document, ensure the file name follows best practices.
You can follow the State of Iowa File Naming Conventions (380.05 KB) .pdf if your department does not have its own.
Why file naming conventions matter
Following proper file naming conventions is important for:
- Accessibility: Clear file names help screen readers.
- Web Performance: Consistent naming improves website performance and directory organization.
- Usability: Properly named files are easier to find and organize.
By ensuring your document files follow the correct naming guidelines, you improve both accessibility and the overall functionality of your site.
Tips on naming conventions
Here are some tips:
- Length: Keep file names under 31 characters to avoid errors and improve readability.
- Punctuation: Avoid spaces, periods, or underscores. Use hyphens instead.
- Description: Use clear, descriptive file names that explain the file’s content.
- Date Format: Use YYYYMMDD for chronological organization. For timestamps, use YYYYMMDDThhmm.
Example of a good document naming convention:
- ProjectName-DocumentType-Date
(e.g., CohortPlan-Schedule-20240511)
Create a document
Create a document by uploading a file
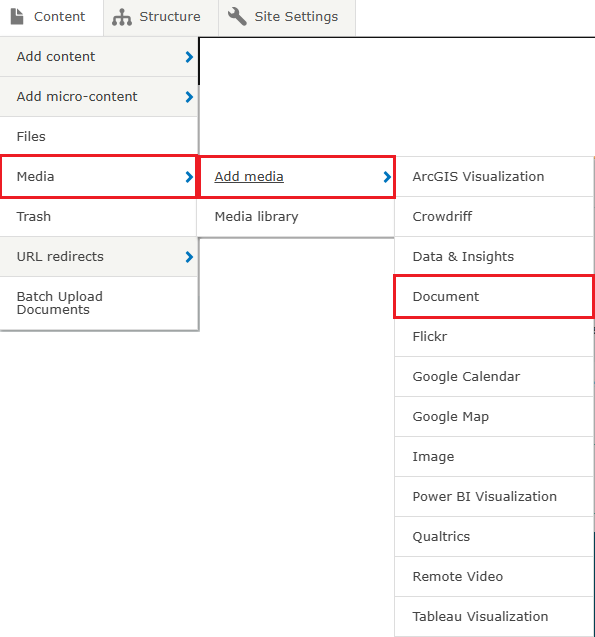
To upload a document to the Media Library:
- Click the Content link dropdown.
- Go to the Media link.
- Select Add Media, then choose Document from the sidebar dropdown.
- Upload the document by selecting the Upload File button in the new window.
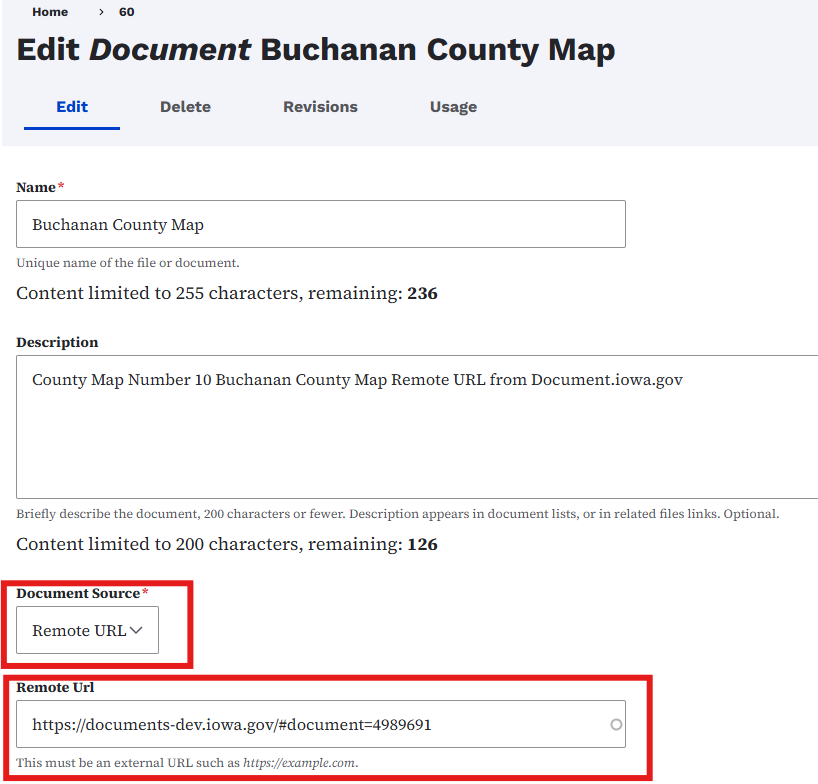
Using a remote URL to create a document
You can create a document link for a file hosted on another website by adding it to the Media Library. Select Remote URL in the Document Source field and enter the link.
This feature is useful for automatically creating a list of both internal and external documents on your website. You can also use topic tags to organize these documents.
For agencies that have many documents but cannot upload them to their site, this feature allows linking to documents hosted on external hubs, like documents.iowa.gov.
Important: If the remote URL changes, you must update it manually to ensure the document remains accessible.
Unique media ID
When a document is uploaded to the Media Library, it is assigned a unique media ID. This ID helps the platform identify and display the document whenever it’s needed.
You can use the media ID in place of the document name.
Embedding a document on a Basic page
Once a document is uploaded, you can embed it into a Basic page by using the Document icon in the WYSIWYG editor, located above the body text field.

After selecting the Documents icon on the WYSIWYG bar, search for the Document within the Documents Library if it has already been uploaded.
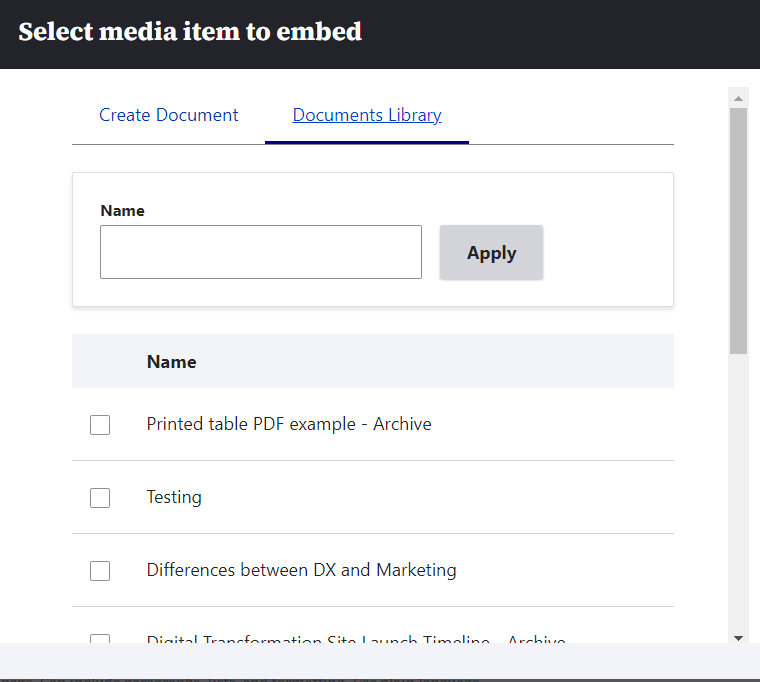
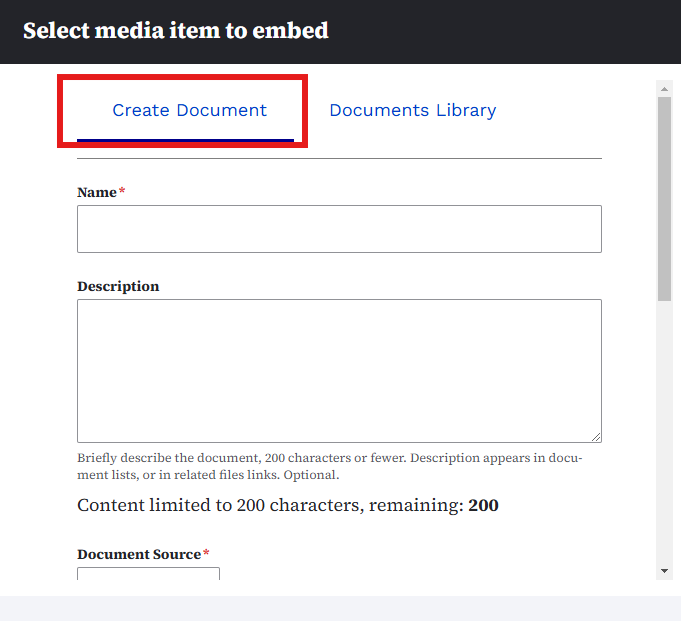
If the document hasn’t been uploaded yet, click the Create Document link, then upload your file in the Document Source field.
The document will be saved and embedded in your page.
For Basic pages and Event pages, you can also use the Related Files field to add links to pages.
How to hyperlink to a document in the Media Library
To link to a document:
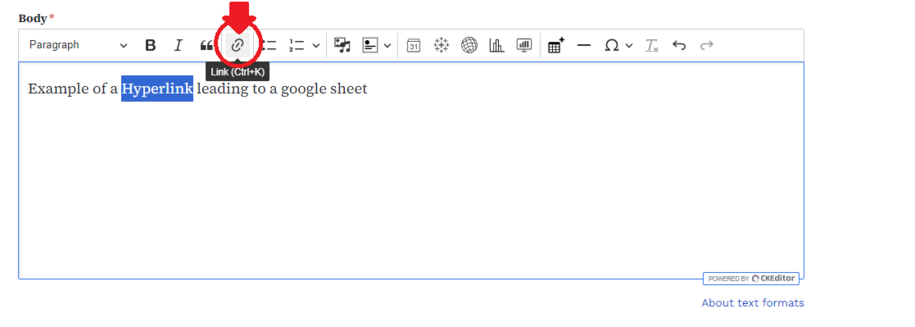
- Within the Body text field, highlight the word or phrase you want to link.
- Within the WYSIWYG toolbar, click the Link (chain link) icon.
Search for the document in the link URL field
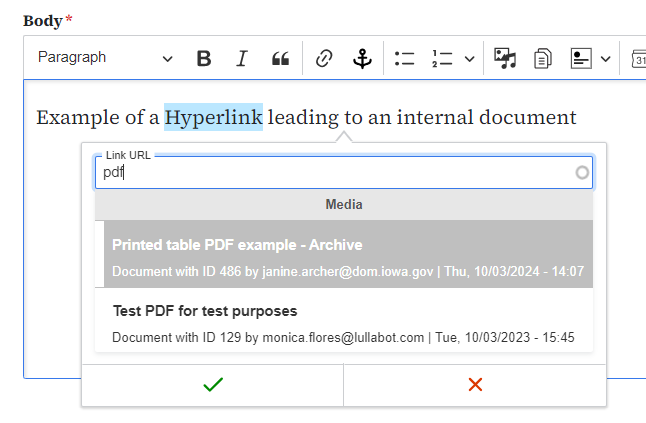
In the Link URL field, search for the name of the document you previously uploaded to the Media Library.
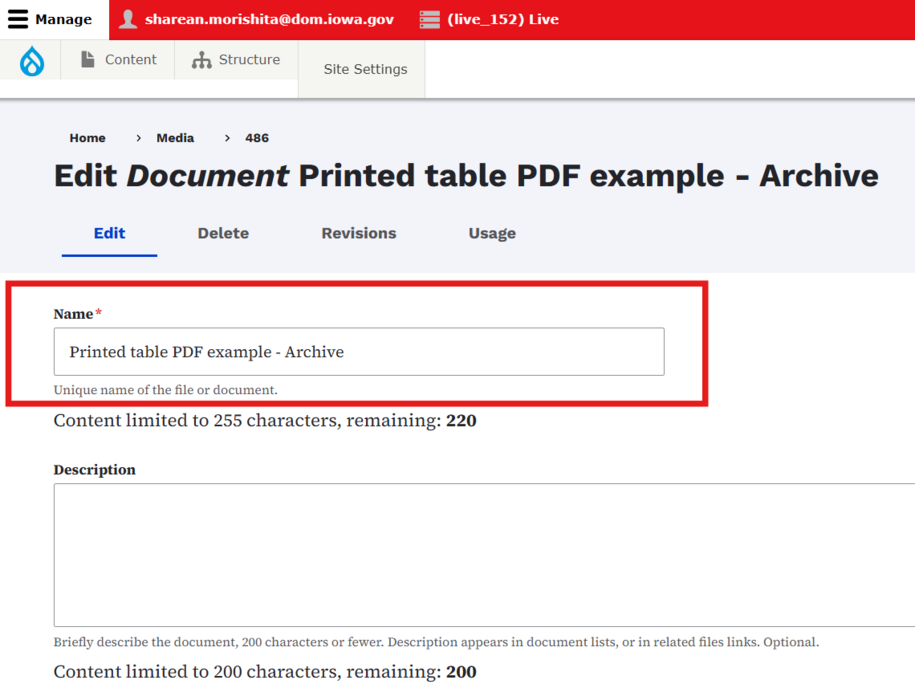
- You can find the document name in the Media Name field of the Media Library or in the Name field within the document’s edit section.
- Do not use the file name from the File field or the file URL.
Example: The name field is where you can find the document name for internal linking.
Completing the internal link
Once you enter the document’s name in the Link URL field, the system will find it in the Media Library.
- Select the document from the dropdown search results under the Media section.
- Click the green checkmark to confirm your selection.
Now, you've successfully linked to an internal document.
Internal linking best practices
When linking to a document in the Media Library, use the document’s name instead of its full URL.
Full URLs are only used when linking to an external page (one not on your site). Using a full URL (https://... or www.xxx) creates an absolute link, which may result in broken links and negatively impact your website's accessibility score.
You can spot an incorrect internal link if you see No Results in the dropdown when selecting the document.
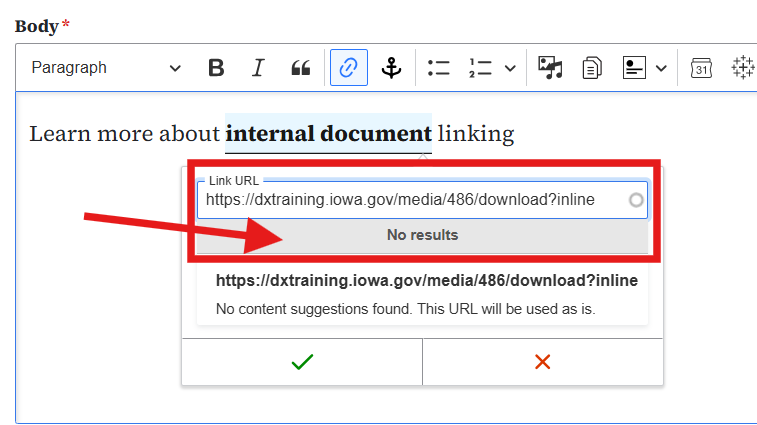
The full URL should only be used for external links, not for documents stored within the site.
How to use the Related Links field
The Related Links field allows you to share additional related information about a topic. The Related Links section is available on Book pages, How Do I pages, Location pages, and News pages. You can add up to 20 related links to your page.
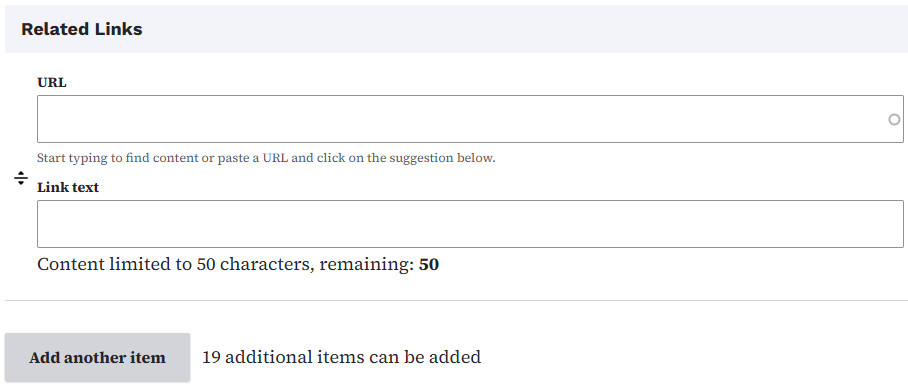
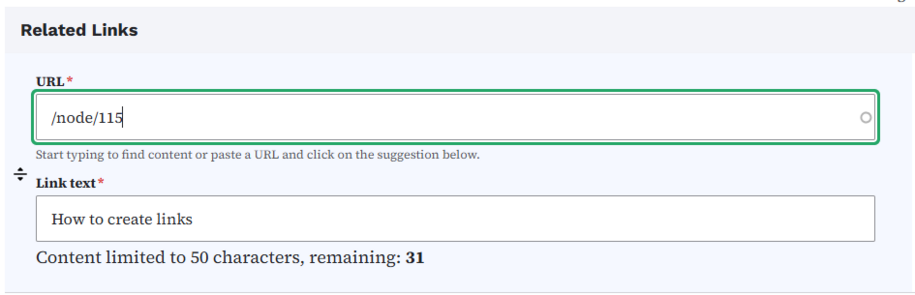
To create a Related Link to a page within your website, start typing the title of the page you wish to link to in the URL field. Once Drupal finds the name of potential pages, click on the one you're looking for. Next, type the text for the link in the Link text field. Creating links within your site this way will allow Drupal to automatically update any URLs should they change. You can add links to other websites or outside pages by added that URL in the URL field, for example http://www.google.com. These absolute URLs will not be updated by Drupal if they change and could lead to broken links in the future.
When Related Links are added to a page, they are added below the body of the page.

How to use the Related Files field instead of a Link Collection
How to update a document and file name
You can quickly update documents in the Media Library. Just use the edit button. This saves you from having to upload a new document with the Add media button. This lets the platform update all the places where the document is linked.
To check if a document follows the correct naming convention:
- Go to the Media Library and filter by Documents.
- In Table View, click the Download button next to a document to check its name.
Alternatively, click the Edit button (or pencil icon) to open the document’s media item page.
- Scroll down to the File field to see the document’s current file name.
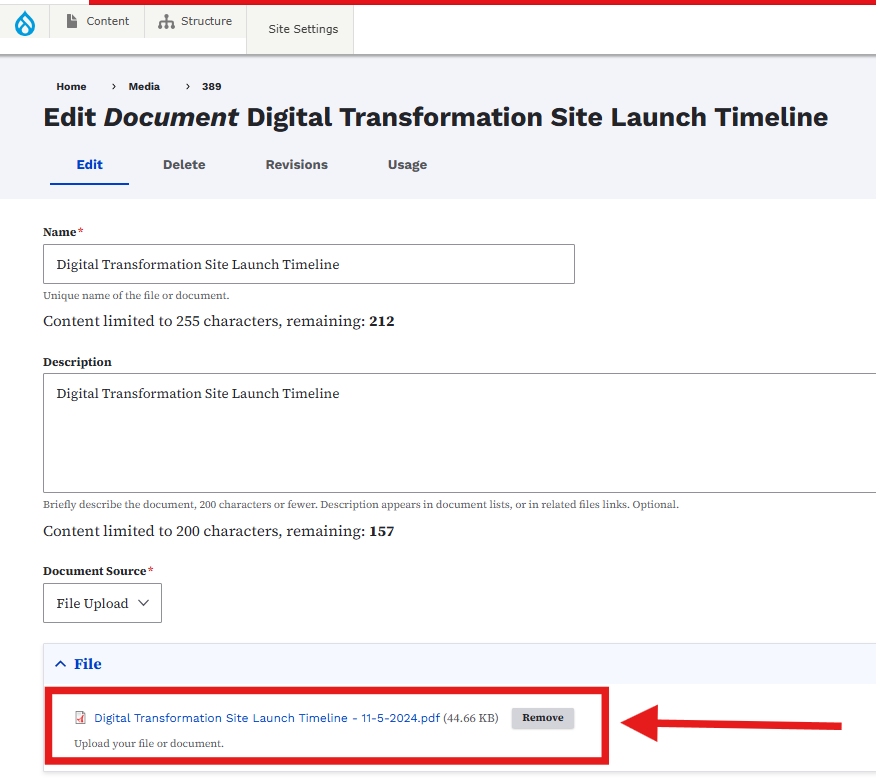
How to fix an incorrect file name
If the file name doesn’t follow naming conventions:
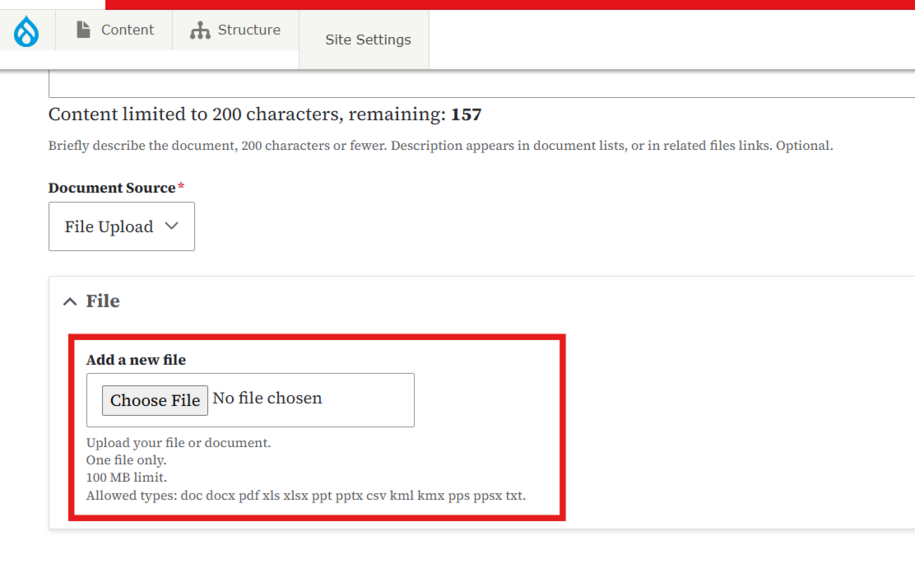
- Click the Remove button.
- The Choose a File button will appear, allowing you to upload a new version of the document with the correct file name.
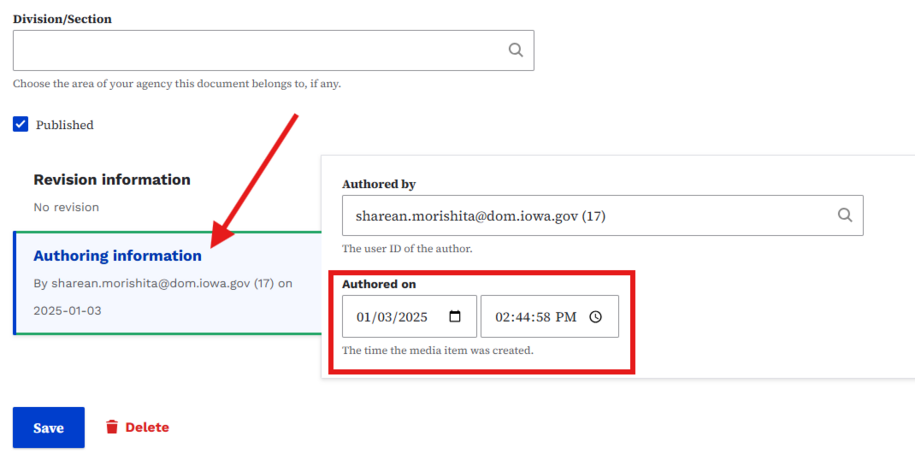
Can I change the date for files uploaded in the Media Library?
Yes, you can change the date shown for a document by updating the following fields:
- Display Date - This controls the date shown under the document title on the listing page.
- Authored Information - By updating this field, you can sort and search for documents by a specific year.
Deleting a document from the Media Library
To delete a file from the Media Library, click the small arrow next to the Edit dropdown in the Media Library.

Make sure you don’t delete media that’s used in microcontent or other pages.
The Media item is still on pages / microcontent
You'll know a media item is in use when you click the delete button. A pop-up alert will show, saying there are recorded usages of this entity.
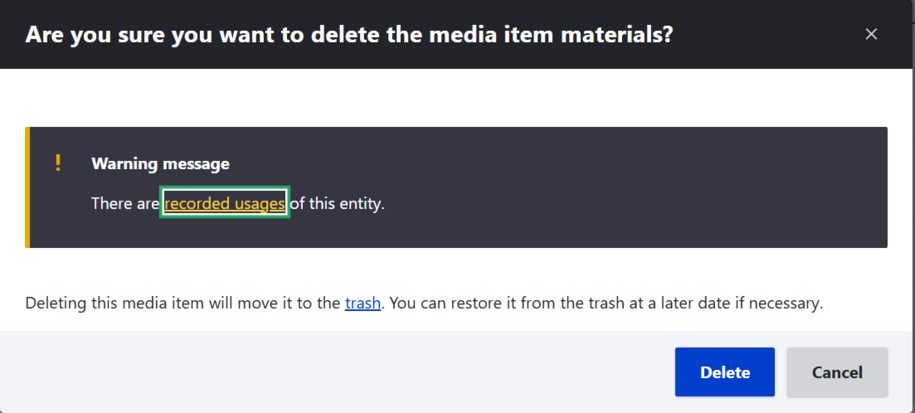
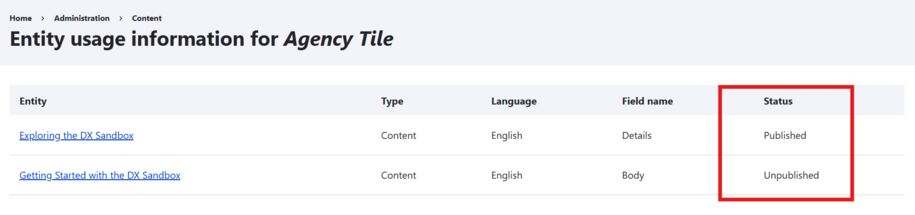
Click the Recorded usage link. This will show you the list of content where the media is published.
After you remove the media from the listed content, it's safe to delete it from the Media Library.
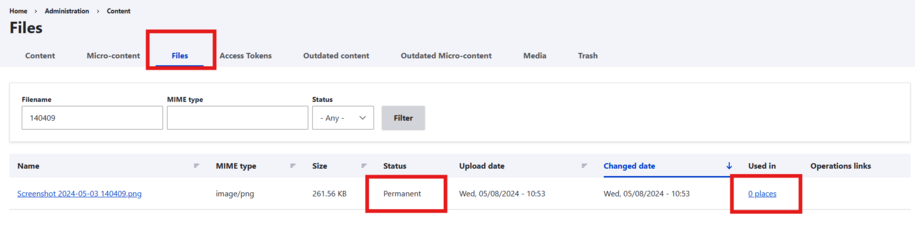
If your team comes across any orphaned floating files with the status showing as Permanent and a 0 is showing in the Used in place, then you can submit a ServiceDesk Plus ticket for our team to have the file hard deleted from the server.