Purpose
Tables are used to show information in rows and columns. Poorly structured tables can be confusing and inaccessible. Accessible tables ensure that:
- Users of screen readers (software that reads websites aloud) can grasp the table's content. This means the screen reader knows which headings go with which information.
- All users can navigate and understand the information easily. A good table structure helps everyone, especially those who struggle to see or comprehend.
When to use Tables
Only use tables for data that fits in rows and columns. Don't use them just to make your page look a certain way. If you just want to move things around on the page, use other embed tools available like tableau embeds, promo microcontent, ArcGis embed, etc.
Use tables when you have:
- Information that clearly goes together in rows and columns: Like prices of items, numbers in a report, or scores from a game.
- Information that's easier to see in a grid: This helps people compare and understand the data faster.
When NOT to use tables:
- To arrange things on the page: This makes the website harder to use for some people.
- For simple lists: If you just have a list of things, use a bulleted or numbered list.
Elements of a Table
Table Headings:
- Use headings at the top of columns (and sometimes at the start of rows) to tell people what the information is about.
- In the WYSIWIG table tool bar, you can easily make a cell and row a heading by clicking the table icon and within the Table properties window, choose Both in the Table Headings field.

- For simple tables, just use column headings. You can also merge and add cells to your table easily using the cell icon when you select the table you are editing:

- Table captions:
- Give every table a short description called a caption. This tells people what the table is about.
- In the DX Platform, there is an option in Table Properties to add a caption.
- The Table caption will appear above the table, and you can toggle the caption on and off using the caption icon when you select the created table.
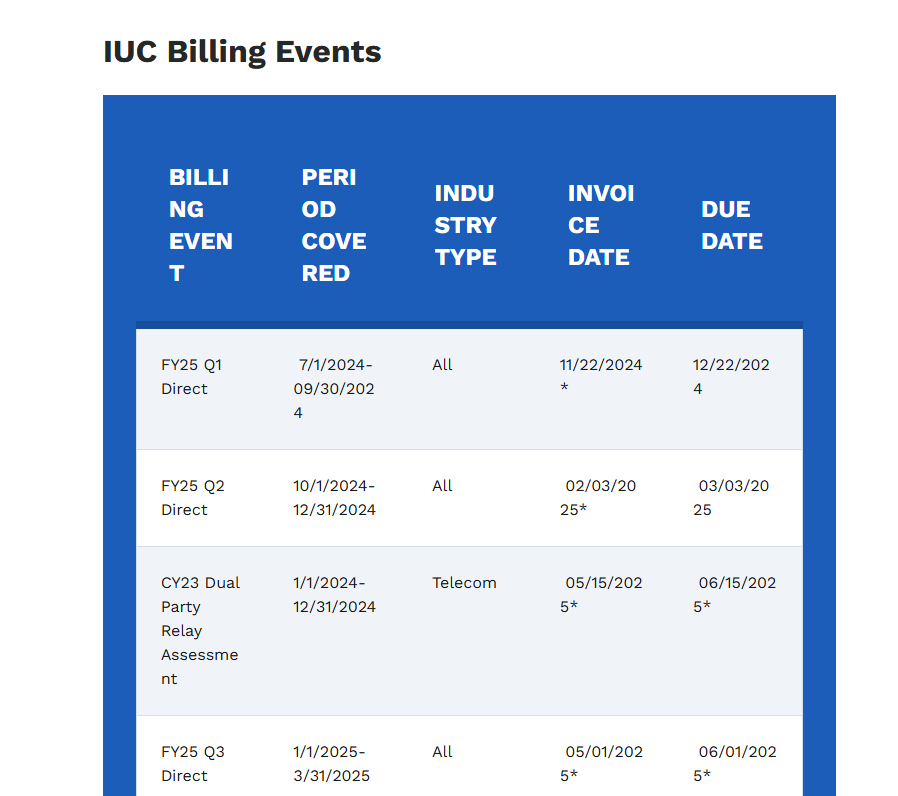
- For example, this table caption Digital Transformation Site Launch Timeline placement appears above this Sites on Platform Table:
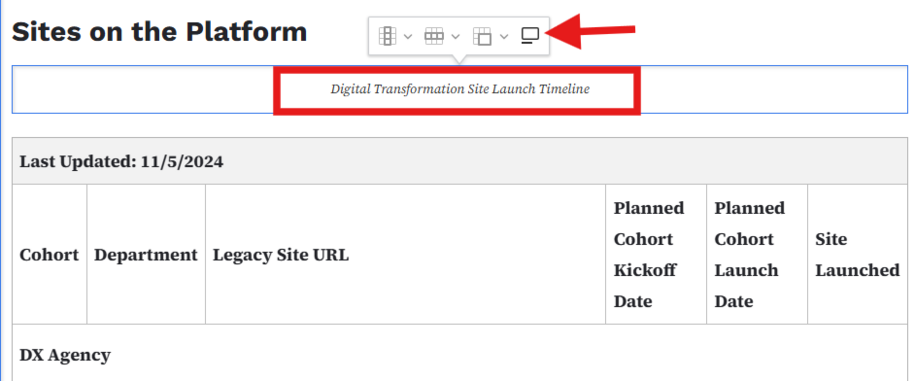
Table format and accessibility
To avoid the blue outline table formatting issues, it's important to only work with one table and not tables within tables.
To make sure columns within tables are accessible, arrow keys have been added to the table. This allows keyboard navigation. Also, it ensures proper labeling for users with accessibility tools, like screen readers.
The horizontal space is limited by the page container, and it can’t be made bigger. You can use a link collection with a table display on a landing page. This works well based on the data you want to show.
Learn more about how to work with link collection list.
When copying and pasting a table, ensure it is well-formed. We found many cases of tables with missing headers. Some tables were nested inside others, and some had a completely wrong format.
Watch MSFW webinar to learn more about building accessible tables with Excel
How to add a Table
You can easily add a table by selecting the Responsive Table icon within the WYSIWIG tool bar. It may appear in different places depending on the type of page where you add your table.


Once you've selected the Responsive Table icon, you can now select the headers, captions, and how many rows and columns you want within the Table properties pop-up window.
Please keep accessibility best practices in mind when it comes to creating tables.
How to edit a Table
If you need to edit your table either by merging or splitting cells, adding rows or columns, or deleting rows or columns, clicking on the table. A small toolbar will appear above with a row of icons where you can use the cell icon to split vertically/horizontally, delete, or merge cells.
To add or delete rows or columns, click on the table. Select the first icon with the highlighted vertical row to add or delete a column. Choose the second icon with the highlighted horizontal row to add or delete a row.
If you need to edit the caption of your table, you can follow the same process by clicking on the table and then selecting the last icon on the right.
This will allow you to see the caption of your table if you currently had it hidden, and from there you can select the caption and start editing it.
Alignment within a Table cell
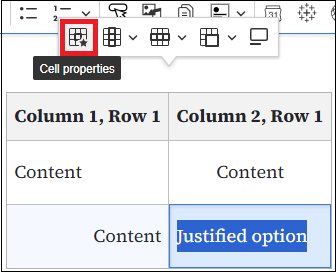
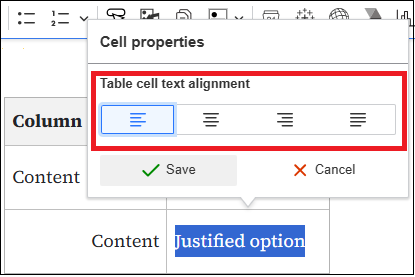
Aligning of text is now allowed within table cells. After you've created your table and entered some text in a cell, highlight the text and the table options mini-toolbar will appear. Select the first table icon with the star, then choose the alignment you'd like for that cell. There is a justified option as well, but you'll need a large amount of text for that option to work.
Fixing nested Tables
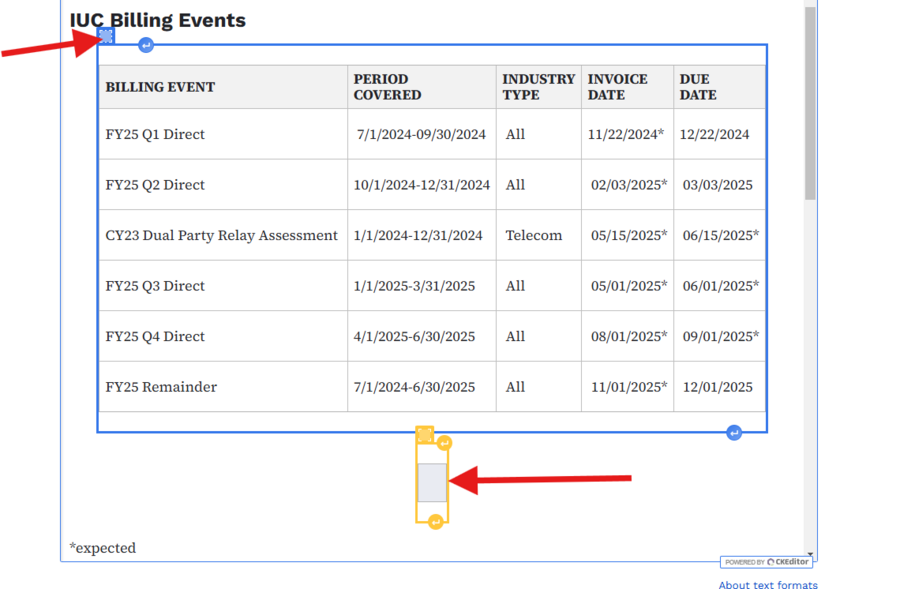
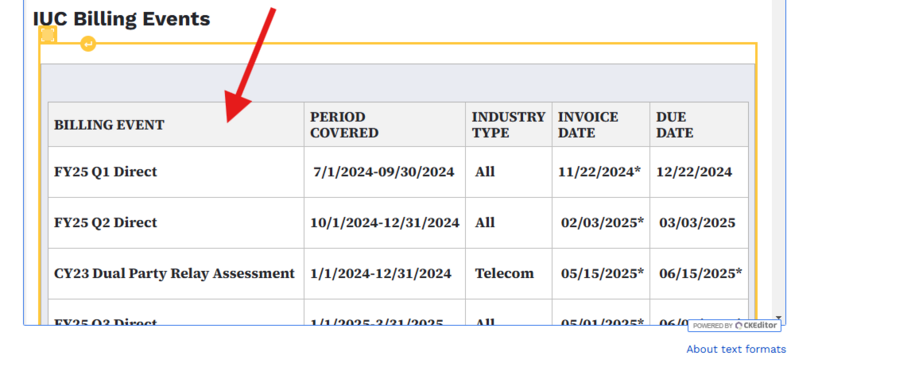
When you create or paste tables, remember they work best if they're not inside another table, or nested. You will know if you have a table within a table if you see a large blue outline around the table.
To fix the table issue, edit your page. Hover your mouse over the table. You’ll see the first yellow outline and a dotted square box icon in the upper-left corner.
To locate the second table that is inside this table, you will then hover over the cell text or row to see the second table and the dotted square in the left corner.
Click and hold the second dotted box and drag that dotted square up and outside of the first dotted square to separate the two tables.
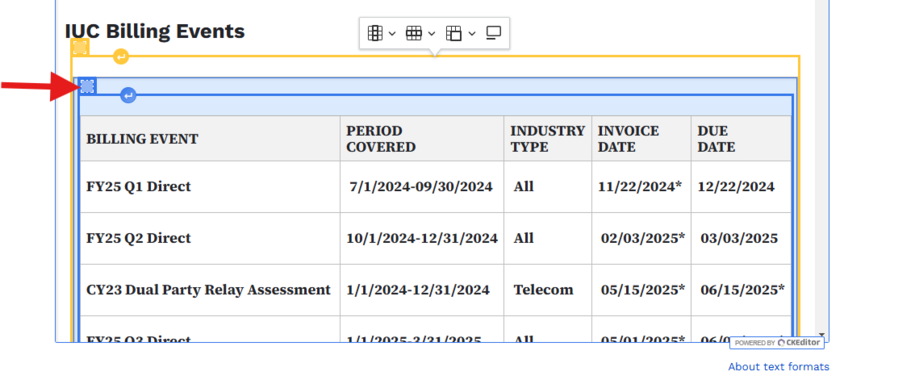
Once the second table is now separated from the first table you can now deleted the empty table box.